Destiny 2 Witch Queen Legendary Campaign Tips and Tricks
Getting the most out of the new Destiny expansion


One of the best new additions to Destiny, perhaps in its history, has been the Legendary difficulty campaign that arrived with the game’s newest expansion, The Witch Queen. It provides an exhilarating challenge in a way that Destiny hasn’t really seen so far outside of Raids and Grandmaster Nightfalls, but one that is sorely needed.
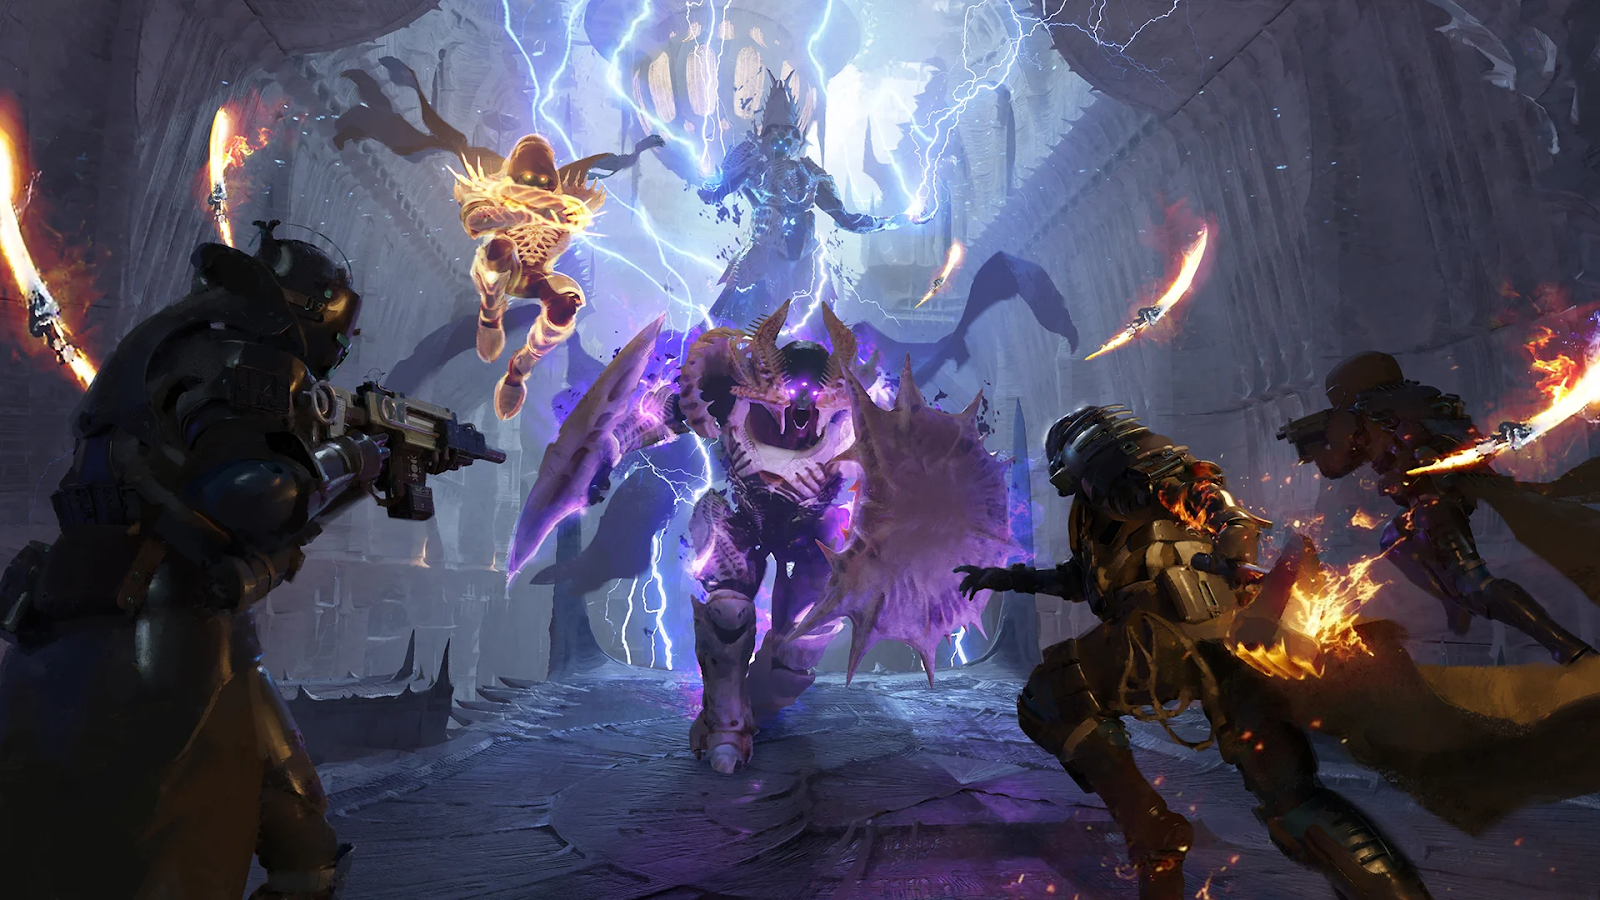
The campaign itself is excellent, not just in comparison to other Destiny expansions but to others in the genre, with Guardians taking the fight to one of the best, most conniving villains we’ve faced yet, Savathûn, the Witch Queen. Thematically this should be a daunting challenge, and the addition of the Legendary difficulty brings this to life masterfully.
Since it is such a challenging experience, particularly on your first time through, you’ll want to make sure you’re prepared. This is especially important as you can’t bypass the challenge by playing with a team because the difficulty scales dynamically based on Fireteam size. Instead of trying to conquer this challenge through the power of friendship or LFG, here are some helpful tips and tricks to get you through!
Rewards
Let’s get this out of the way first as this is usually a Destiny player's first thought. Like a dog thinking about food, our first thought is always loot.
The Legendary campaign gives enhanced rewards in two forms, one for reaching certain stages within the missions, and the other a grand prize for completing the whole campaign on Legendary.
As a reward for progressing to certain stages within missions, you will:
- Earn a bonus chest at each checkpoint (equating to roughly three extra overall per mission), which contains good amounts of XP, Glimmer, Upgrade Modules, and world pool gear.
- Earn greater Throne World reputation to acquire Throne World gear and unlocks faster.
As a reward for completing the whole campaign on Legendary, you will receive:
- A full set of 1520 Power level gear.
- Eight Upgrade Modules.
- The Triumph required to complete the Throne World’s seal.
- A choice between two new Witch Queen Exotic armour pieces for your class.
Overall, this isn’t really anything you can’t get elsewhere but it is a nice boost to get you going this Season. The extra Upgrade Modules are perhaps the most useful reward as new Seasons and expansions always eat into upgrade materials at an alarming rate. Last but not least, who doesn’t love getting a new Exotic for free?
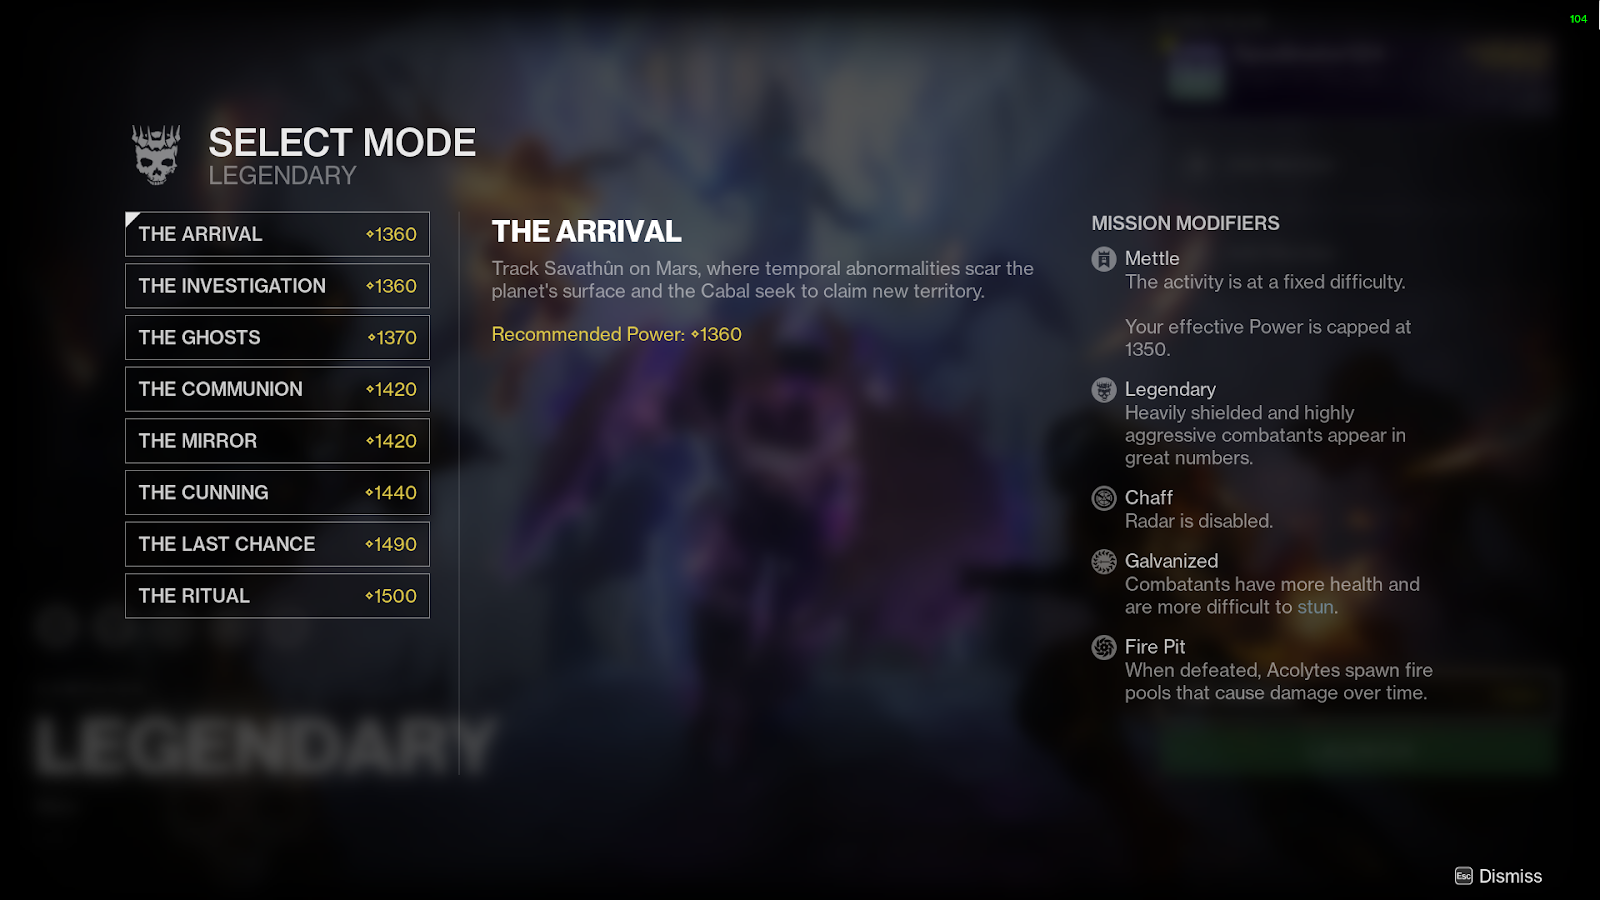
Campaign modifiers and Power level
Before you even step foot into the first mission it would be a good idea to learn the basics of the Legendary campaign.
Every mission on Legendary difficulty will have the following six modifiers active that change up how you play:
- Mettle: The activity is at a fixed difficulty.
- Legendary: Heavily shielded and highly aggressive combatants appear in great numbers.
- Chaff: Radar is disabled.
- Galvanised: Combatants have more health and are more difficult to stun.
- Fire Pit: When defeated, Acolytes spawn fire pools that cause damage over time (Only active in ‘The Arrival’, ‘The Investigation’, ‘The Ghosts’, ‘The Last Chance’ and ‘The Ritual’).
- Empath: Enhanced radar. Take increased damage from melee (Only active in ‘The Ghost’, ‘The Mirror’, and ‘The Cunning’).
Without your radar, melee enemies like Hive Thralls will be jump-scaring you constantly so stay alert, especially when Empath is also active as they can quickly overwhelm you and quench your Light if you’re not careful. With ‘Legendary’ and ‘Galvanised’ active your enemies will also be more aggressive and more resistant to stunning. Due to the increased number of shields, you’ll want to try to cover the three shield types (Arc, Solar, and Void), or at least have a high-powered weapon to take them down quickly before they become an issue. Just be glad ‘Match Game’ isn’t active!
The campaign also has an increasing recommended Power level with each mission. Suggested Power levels are active in every activity in Destiny, but the Legendary campaign difficulty comes with an added challenge - ‘Mettle’. Player Power levels are capped at 15 below the suggested level, making the missions more challenging as you will always be below the Power level and unable to over-level. On the bright side, this can save you some infusion materials as there’s no need to push your level as high as you can, only enough to keep up with the cap.
Range and cover are your friends
Sticking to cover may sound blatantly obvious if you’re new to Destiny as many other shooters encourage a more defensive playstyle, but Destiny is usually an aggressive, fast-paced game in most activities. However, foes in the Legendary difficulty hit hard and will often overwhelm you. If you’re exposed, then you will assuredly die a quick death. The way to get around this is to play it safe. This doesn't mean you have to play defensively, only taking a few shots at a time. Instead, this difficulty urges you to play cautiously. Stick close to cover and pick your enemies off from range. Move around the arenas to avoid lines of sight, and don’t get caught out in the open with powerful enemies gunning for you. Being close to cover at all times means that, if you get low on health, you’ll have quick access to relative safety to recharge your shield and reload.
Lots of the encounters have large spaces to fight in, giving you plenty of breathing room to manoeuvre and keep your distance. There are a few encounters that are more cramped and close range so in these you'll want to keep moving before the enemies catch you out.
Flexible weapon loadouts
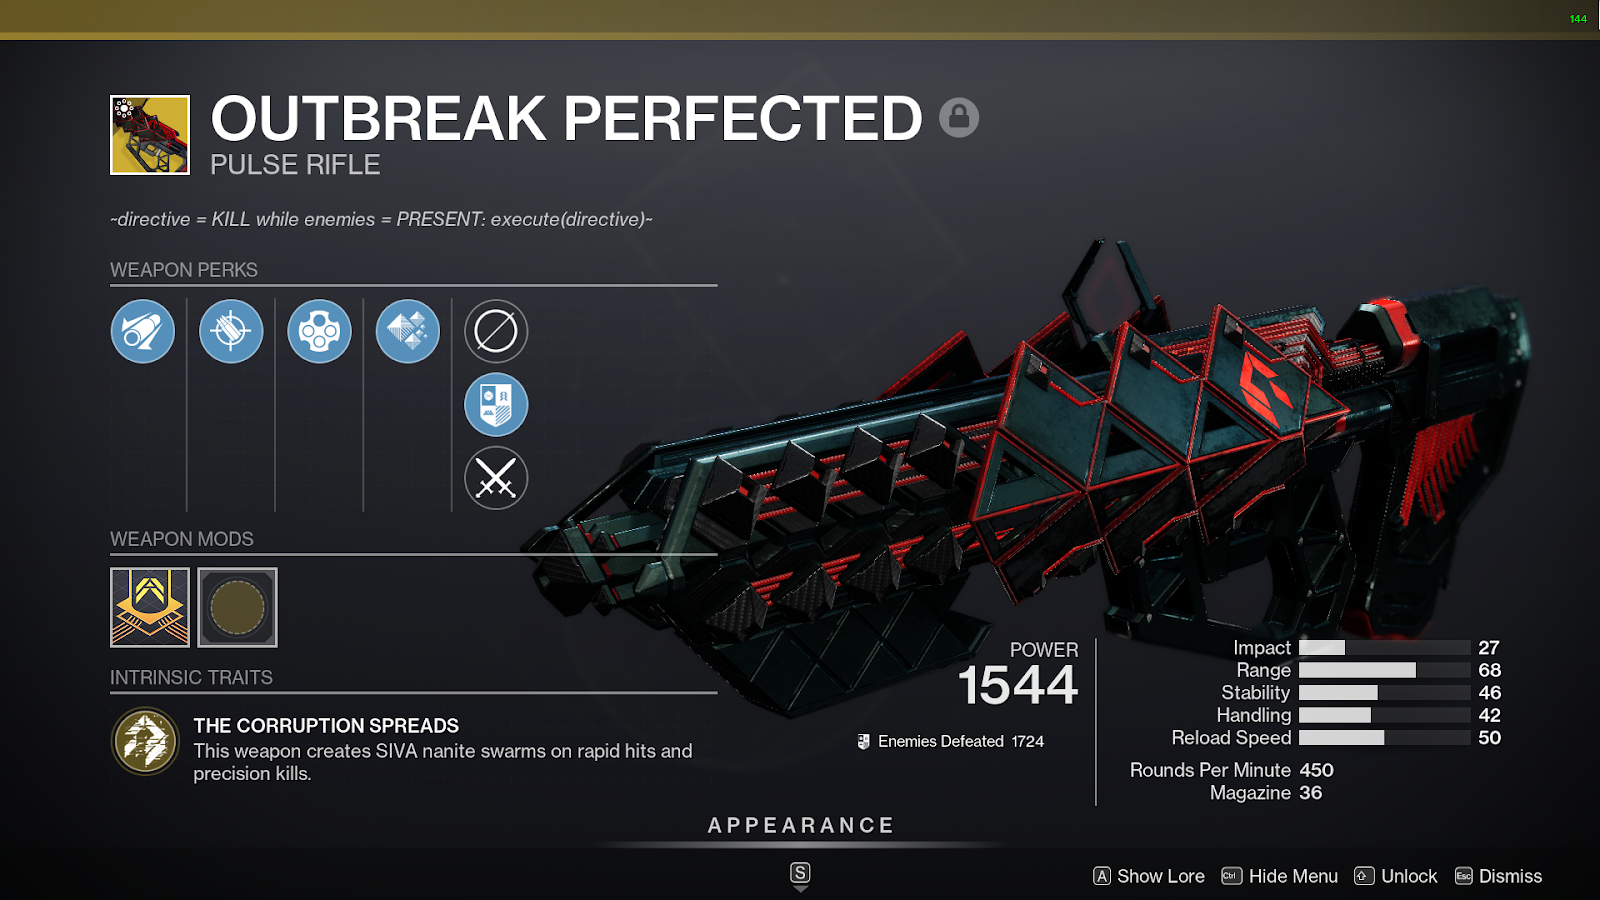
Since it’s often best to keep your distance, you’ll typically want to use a weapon with some range. However, you don't want to go overboard as there are many times when you're funnelled into a small space and asked to stay highly mobile. A pulse rifle is perfect for the job as they strike the perfect balance between ranges. The Exotic pulse rifle Outbreak Perfected is a great choice since its special perk causes it to deal extra damage with rapid or precision hits. It's perfect for keeping your distance taking out smaller enemies or for eliminating bosses, but it's not limiting when you're forced into close combat. If you don’t have Outbreak Perfected, then any pulse rifle should do the job well enough. Other good options include hand cannons like Ace of Spades and even scout rifles for the larger arenas.
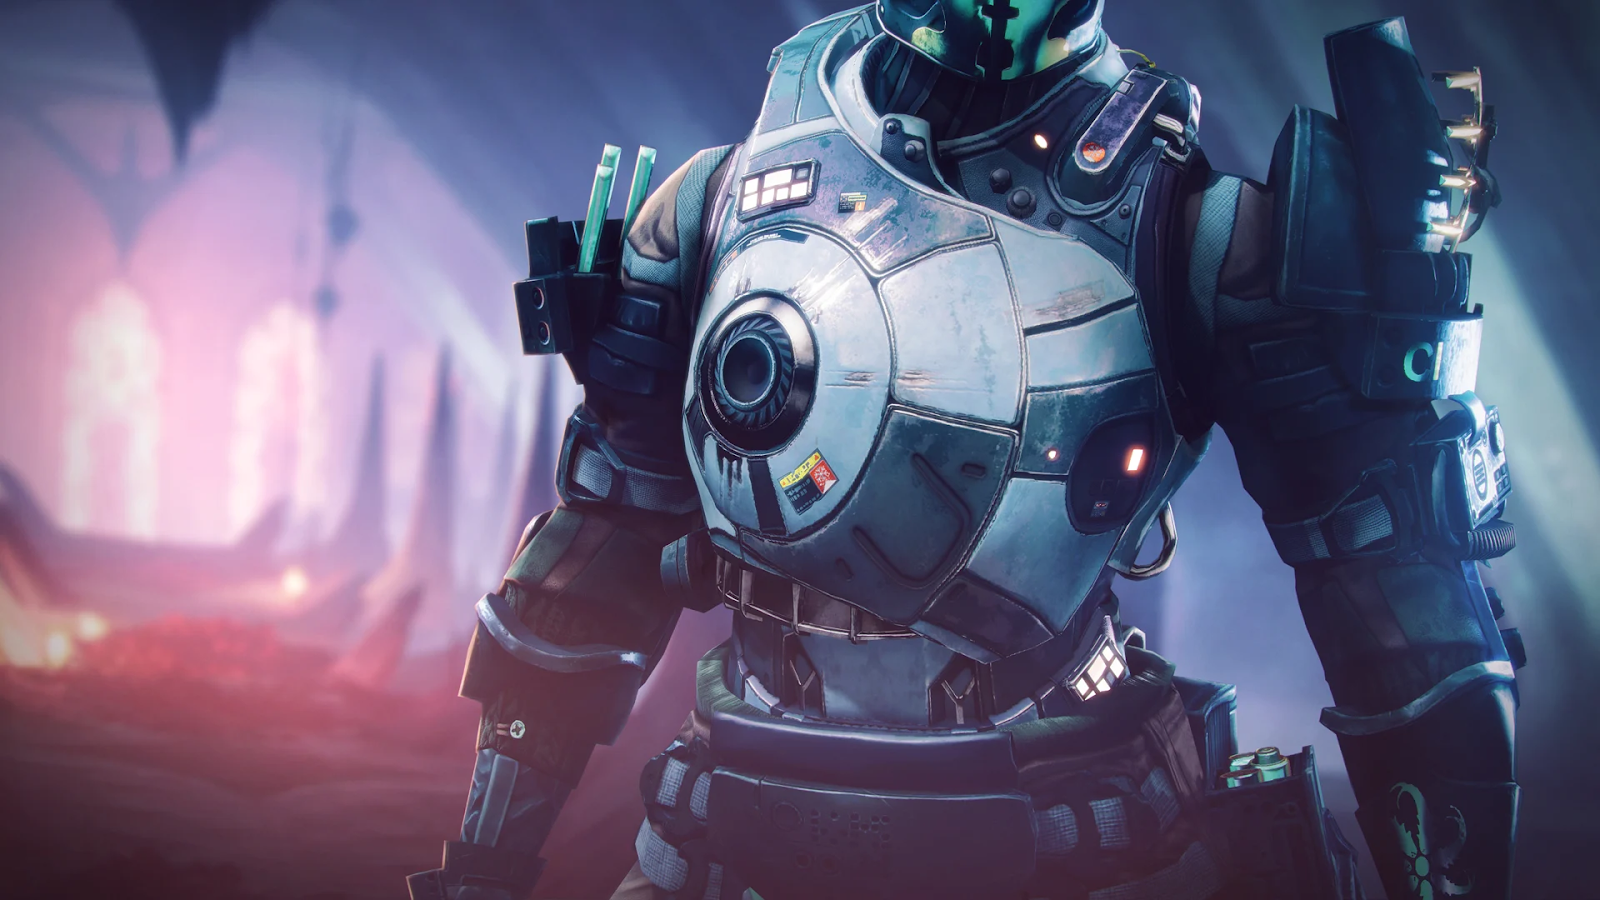
The new Exotic SMG Osteo Striga is also an excellent choice as its poison damage is effective against bosses and for eliminating waves of weaker enemies like they’re dominoes. This one is a little trickier to get though as you have to have already completed The Witch Queen campaign once before (on Normal or Legendary) and is currently only available to those who have purchased the Deluxe Edition of the expansion.
The most important point on weapon loadouts is to be flexible to meet the demands of the encounter. There are some cases where an SMG or shotgun might be better suited, and others where a pulse, grenade launcher, or fusion rifle might be better suited. Unlike some of the other challenging activities in Destiny, the Legendary difficulty campaign does not restrict you or lock your loadout once you're in-game so take full advantage of this and change your loadout when you need to.
Suppression is your best friend
Make full use of Suppression. That's it. You can thank me later!
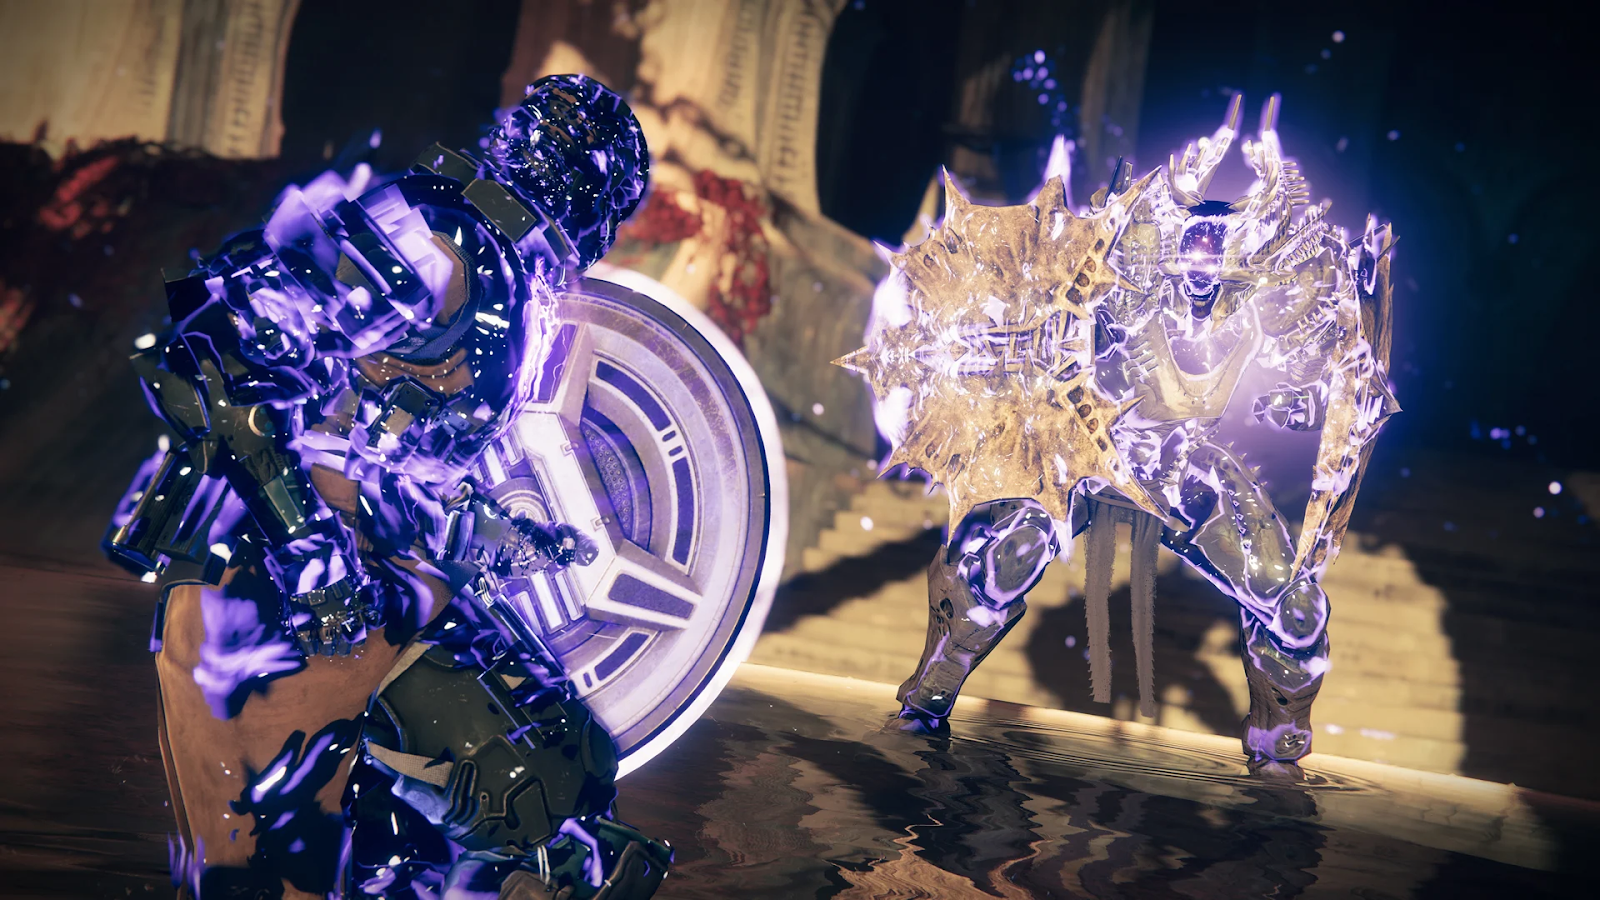
Suppression has always been in Destiny but never has it been more important than now due to the absolute powerhouse that is Void 3.0 and the power of the new Lucient Hive Guardians.
With Void 3.0 every class can now use Suppression Grenades. These grenades will, as the name suggests, 'suppress' a foe if caught in the blast. This status effect will disorient enemies, making them cover their heads, unable to attack. Suppression grenades offer a great opportunity to deal some easy damage on those tougher enemies.
What makes Suppression as useful as it is in the Legendary mode, however, is its ability to Suppress the new Lucient Hive Guardians. These new enemies are imbued with the Light, giving them access to the same powers we've been using for all these years. This can make them a pretty formidable foe, and even more so when you're facing multiple at a time. This is where Suppression Grenades and the new Seasonal artefact mod, Suppressing Glaive, are vital. Suppressing Glaive gives your glaive the ability to inflict the Suppression status effect at will, and with an ammo count around twenty, that's a lot of potential utility on offer. Suppression will immediately stun these new Hive Guardians and, if they're using their Supers, turn off their powers for the duration of the effect. You could say it's a Light-switch! This makes those tough encounters with Hive Guardians significantly easier as it takes away their power to kill you in the blink of an eye.
Once again, don't ignore Suppression!
Make a build
Over the past year or so Bungie has really been improving the build potential available in Destiny. There's now so much more you can do to customise your abilities and create amazing synergies. While this isn't necessary for most activities, it helps out significantly in the Legendary mode campaign. You don't need a fully optimised build to be successful (although that does help), just some synergies between abilities and exotics will do just fine to get you through.
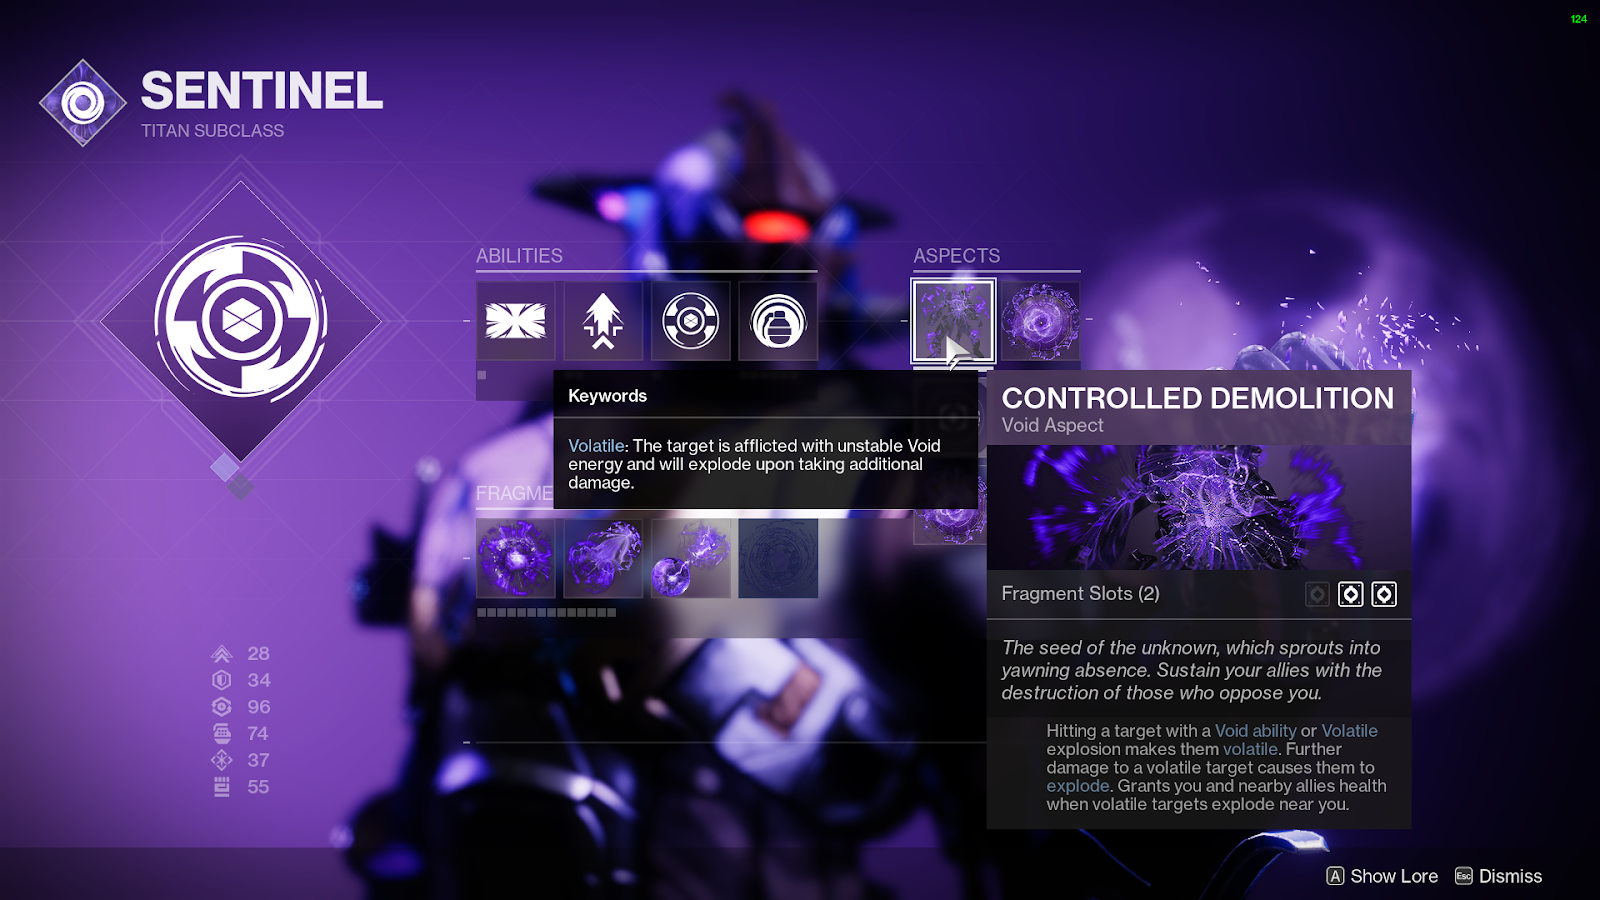
The elephant in the room here cannot be ignored - currently, only two of the four subclasses use the new subclass customisation system - Stasis and Void. This new system allows for significantly more build crafting and optimisation through Aspects and Fragments. Void is the hot thing right now and for good reason, it's incredibly strong! Abilities recharge quickly and deal truckloads of damage, and add on to that the Suppression Grenades mentioned earlier, making Void 3.0 a rich mine for builds.
Don't be afraid to use your Super, and heavy ammo
If you're anything like me then you'll save your Super or rocket launcher for the perfect moment. Well, you should also know then that that moment never comes. I'm always holding onto my Super or clenching tightly on my fully stocked rocket just in case I really need it later, and by the time I realise I haven't used either I'm near the end of the mission. Don't be afraid to use your super and heavy weapons! There are some pretty tricky fights in the Legendary campaign where you'll be swarmed or attacked from all angles, this is what these tools are meant for. You don’t need to cautiously shoot your way through these trickier sections when your magic powers or high-powered explosives can blast you right through with ease. This is made only more obvious by the rally banners found before most of the more challenging fights which will fully recharge your abilities and restock your ammunition anyhow, so it typically doesn’t matter if you don’t have Super charge or ammo before a fight.
Use Rally Banners - they're free!
Speaking of – use rally banners! At first glance, these rally banners might fool you for the raid banners that you can buy from Hawthorne in the Tower. Whilst they serve the same purpose of fully replenishing your supplies, including abilities and supers, these ones are free! In fact, they're not even an item you need to acquire, you simply just have to walk up to the glowing circle and press the button to use them, instantly reaping the rewards at no cost to yourself. These are also not one-time use; if you die, you’ll be able to use them again as many times as you need. Use the tools of a Guardian as and when you need and make use of rally banners to refuel your assault against the forces of darkness.
Rally Banners are checkpoints
The new missions that came with The Witch Queen are surprisingly lengthy, much longer than most campaign missions we're accustomed to. Playing on Legendary difficulty stretches this even further, with some missions clocking in at around 40 minutes, upwards of an hour if you're having a hard time. Thankfully, you're not expected or required to do this in one sitting.
Rally Banners also act as checkpoints, not only for when you die in a Darkness zone but also between sessions, much like how checkpoints are handled in the Raids. They serve as a persistent save point if you decide to leave halfway through a mission. So, if you need to leave to handle something important or simply want to take a break then you can do so without worrying about losing valuable progress.
Those rally banners just keep getting more handy, don't they?
Play at your own pace
The new Legendary difficulty is some of the most fun to be had in Destiny, but it is certainly challenging, especially towards the end. That’s why this tip is last – take your time. There is no need to push yourself beyond the point of enjoyment; play at your own pace to succeed. There’s no pressure to go as fast as you can or to die as few times as possible. Take as many breaks as you need, that’s why the checkpoints are there. Plus, you might find it easier to come back later and try a challenging part again, I know I did on a few occasions. Keep these tips in mind and achieve victory for the Light any way you can.
Thank you for reading, if you found any of these tips helpful then I’m glad! If you’ve got any tips of your own then feel free to send them to me on Twitter.
Join the conversation
What do you think? Reply below to share your perspective.