Intro to Europa Universalis IV: The First Turn
An accessible guide for newcomers on how to conquer Europa Universalis IV

There are worlds and worlds of Europa Universalis IV strategy guides, and every single one of them assumes that you're a top-level expert looking to break the game over your knee.
It’s understandable. When you’ve put thousands of hours into a game, it’s easy to forget how intimidating it was the first time you fired it up. For most people, this is where the Paradox Interactive experience ends - lost amid an endless procession of menus that sap your will to continue and a wiki that actually has a transformation matrix on one of its pages.
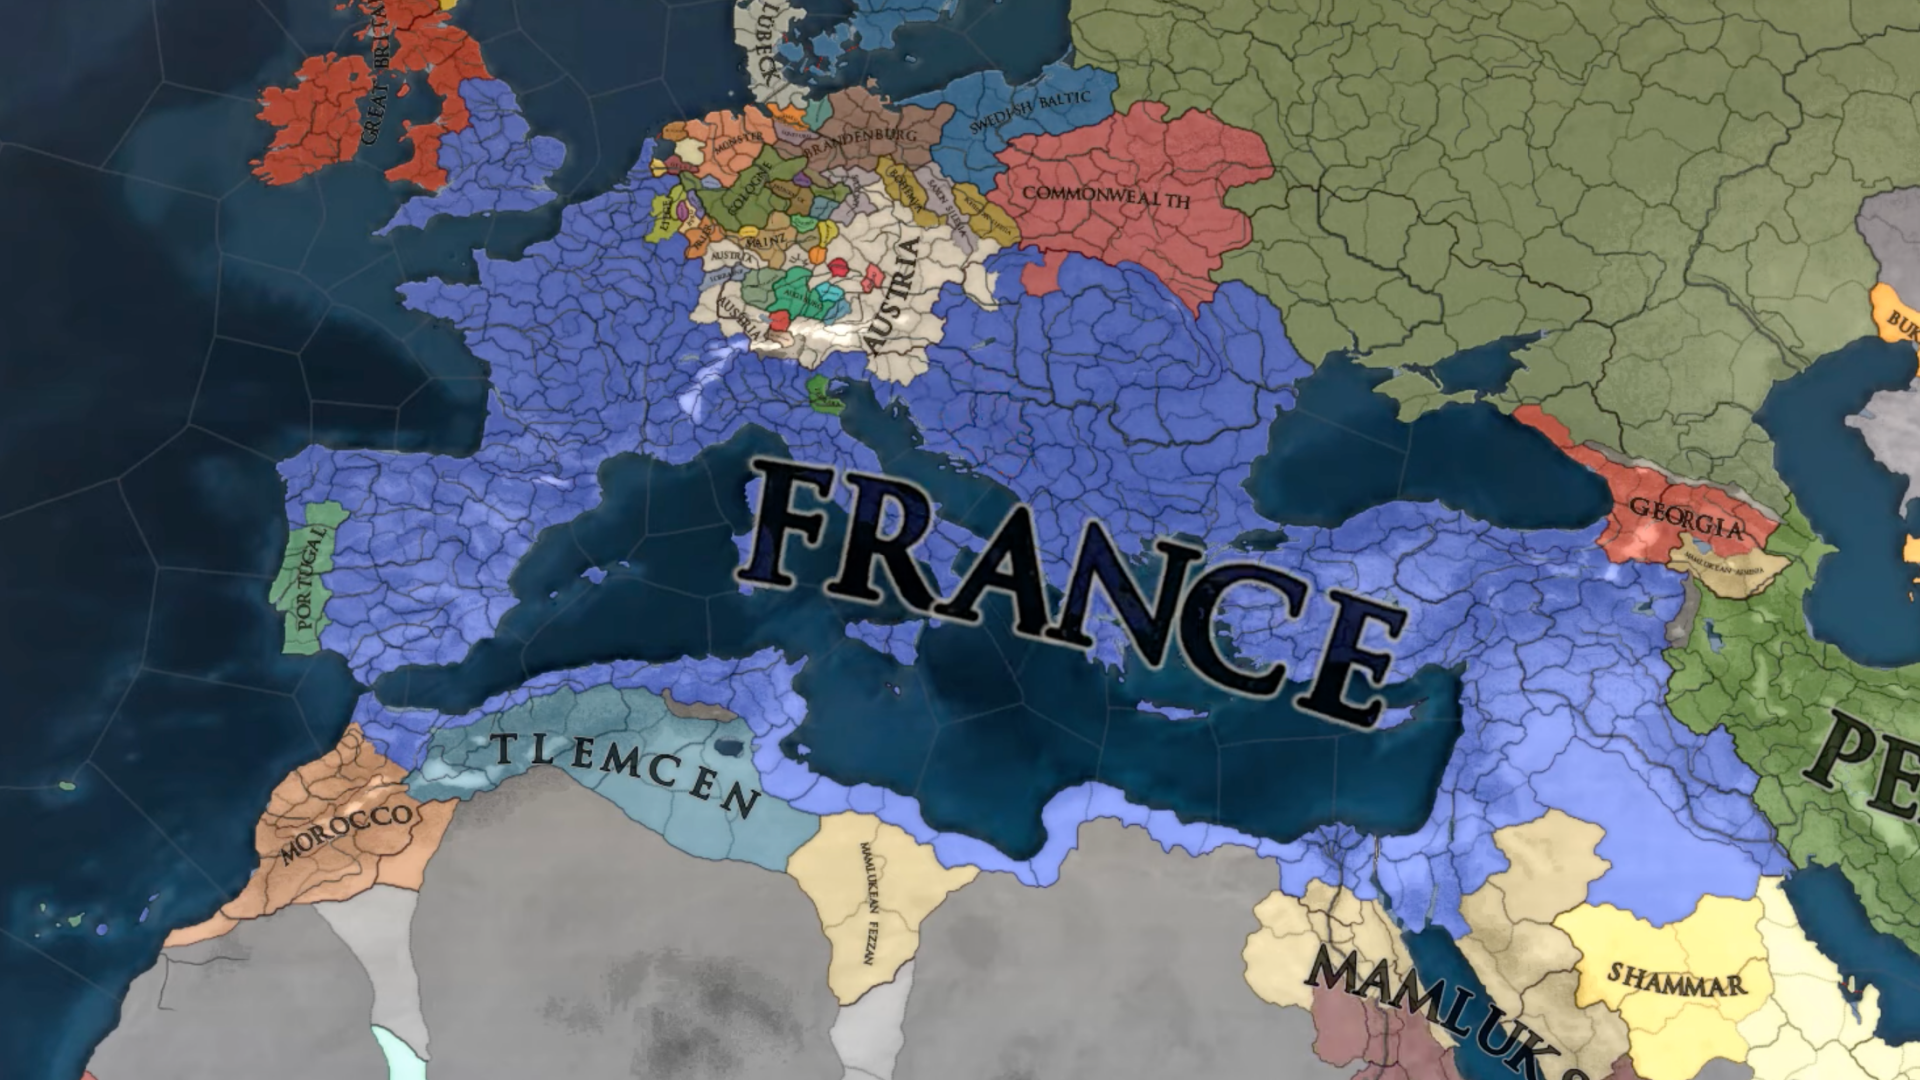
This guide, by contrast, assumes you know nothing about Paradox games. This is a first-turn guide, detailing what to do when starting a campaign. For this demonstration, I'm going to play as France, known to aficionados as the "Big Blue Blob." While this is not a country recommended for beginners, it’s still a good entry point. France is a powerful European monarchy with no unusual mechanics, but lots of flavor events and just enough quirks to let me show how to comprehend the game’s logic.

Introducing the Five Key Resources
Welcome to the first screen. Here you can click on various buttons to unlock twenty-odd submenus with differing levels of functionality and value, but let’s begin with what is currently visible.
There are five key resources in EU4. The first two, highlighted in blue:
- Money. Measured in ducats, this is used to raise and maintain an army and navy, construct buildings, hire advisors, and maintain colonies. There are many ways to make money in the game, such as internally through tax, industry and gold mining, externally through trade and vassal taxes, and through war reparations.
- Manpower. These are the men you have in reserve but have yet to be assigned to regiments. You use them to raise new regiments, but also to heal existing ones. If you deplete your manpower reserves, your army becomes vulnerable. It no longer can fight at full strength. Earlier on in the game, it’s wise to have at least as many men in reserve as you have in the field. Manpower recovers slowly, though there are a few ways to gain soldiers quickly.
Highlighted in green are your three types of monarch power. You gain this power primarily through your ruler and advisors and can gain (or lose) this power through random events. Monarch power is used to advance your technology, activate new ideas (read: permanent bonuses), and develop your provinces. Each type has specific functions as well:
- Administrative power represents your internal control over your domain. It is used to develop economic buildings, unlock idea groups, stabilize your kingdom and keep inflation in check. You can also use it to absorb newly conquered lands into your patrimony. This will likely become your most important resource early on
- Diplomatic power represents your ability to influence your neighbors through means other than war. It is used to develop new types of ships, recruit admirals and explorers, influence culture within your kingdom and annex land belonging to your vassals. For colonizers, it also affects the speed at which colonies grow and how far away they can be established.
- Military power represents the sophistication of your land forces. It is used to develop new types of regiments, hire generals, develop new defensive buildings, and grant various passive combat bonuses. We can also spend it to execute certain specialized combat maneuvers and temporarily suppress a rebellion.
Mousing over any of these will tell you how much you are gaining or losing and why. Through these features, you will see what you need to focus on. For most countries, the critical early game resources are money (most kingdoms begin with only a slim surplus and you can easily go into debt from a single bad event or a long war) and administrative power, which you will use as fast as you get it on growing your territory.
Early Game Priorities
France is a little different. You may have noticed from the image above that France looks a little...blotchy. That’s because we start with five vassals, representing the powerful duchies in France. One of our initial objectives is to absorb all of those vassals, and that’s going to take lots of diplomatic power. Add that to the fact that we won’t need administrative power to reclaim the land that’s rightfully ours from the English, and you can see that we want to prioritize diplomatic power for now.
Once you’ve played a few campaigns, you should be able to pick out your early game priorities pretty easily.
Highlighted in red is one more notable number: Stability. This affects your tax base and can lower or raise the risk of a rebellion. It's critical to keep it positive, as negative stability puts us at risk for some terrible times. Good luck keeping it high, though! As a monarchy, our stability drops every time a king dies. We can raise it by spending our ever-useful administrative power, but a better idea would be to boost it through random events. Early on, when an event can affect your stability, always take an option that will raise it and never take one that will lower it.
We can now explore the menus and go numb from information overload. Thankfully, there’s seldom a reason to go to most of those tabs because of another useful feature: Alert flags, the little icons on the top right. These come in green (low priority), yellow (high priority), and red (critical). Clicking on one immediately opens the relevant menu.
We have three right now. The rightmost green flag is telling us we have empty seats in our advisory council (which won’t matter until we have the money to fill them), while the middle flag displays a list of known kingdoms without heirs that we might subjugate with a royal marriage. The red flag tells us we need to pick our rivals - a system that grants bonuses for being nasty to your long-time enemies and prevents big countries from getting too cozy with each other. I pick England and Aragon as my rivals, as I expect to be in a war with both of them shortly.
Disposition & Submenus
It’s important to review the disposition. We have two armies - one with 13 regiments, one with 15, and a pathetically tiny navy. Leaving an army without leadership is a mistake, so we’ll click on each of them and assign a general. Fortunately, France starts with two, so we don’t need to waste military power or risk our king’s life by having him lead the troops personally.
I'm now going to get everything set up for when I unpause the game. Clicking on the big button on the top left will show us a selection of submenus. We'll start with the tab on the far right.

This is the submenu for our estates, the various groups of landholders within our kingdom. Different countries and governments have different estates (or other systems altogether, such as a parliament), but most have some variation on the traditional European estates - Clergy, Burghers (a proto-capitalist class) and Nobles, representing our three monarch power types. They may have different names depending on culture (the Burghers are called the Bourgeoisie in France, for example, but they act the same).
EU4 is, in part, the story of how weak feudal monarchs turned into mighty absolute monarchs. This tab is where we start the process by disempowering the troublemakers.
The first thing we’re going to do is claw some of our lands back from them, which we do by clicking the button on the right. We can use this action once every five years when we’re at peace, and can only be done safely when every estate has a loyalty (the left-hand number under each estate) of at least 50. What a coincidence - everyone has fifty right now! Seizing land should always be your first move.
This leaves all the estates at a loyalty of 30, which is the threshold before they become restless and angry. We can make them happier by clicking the middle button to summon the diet. This will temporarily boost their loyalty and influence (the number on the right, showing their relative power), and will present us with a selection of agendas, basically sidequests that can further boost their loyalty and grant various perks. One risk here is that you have to take one agenda. If none are workable, you’ll just have to take the L on whichever hurts you the least.
I am choosing to go with the agenda of the Clergy, who want me to increase the Pope’s opinion of us. Compared to the others, it’s easy: send a diplomat to the Papal State and wait until the game tells me we’re done. As a further boon, it won’t cost me anything. My reward will be a temporary boost in papal authority, which I can cash in with the Curia for various buffs.
The last thing we’ll do is assign estate privileges. These are concessions that will grant various bonuses and penalties and adjust the estate loyalty equilibrium. Yes, that number isn’t static - it will drift slowly toward a fixed point. I want the equilibrium for each faction to be at least 45 and ideally 50. This will make it easier to seize their land, and the more often I can do that, the more powerful I become.
My goal is to have at least 60% of the land in France under my direct control by the mid-game to take advantage of a very fun mechanic that unlocks afterward. Unusually, the French Nobles begin with a privilege in place already - French Strong Duchies, a very useful one.
Diplomacy and Alliances
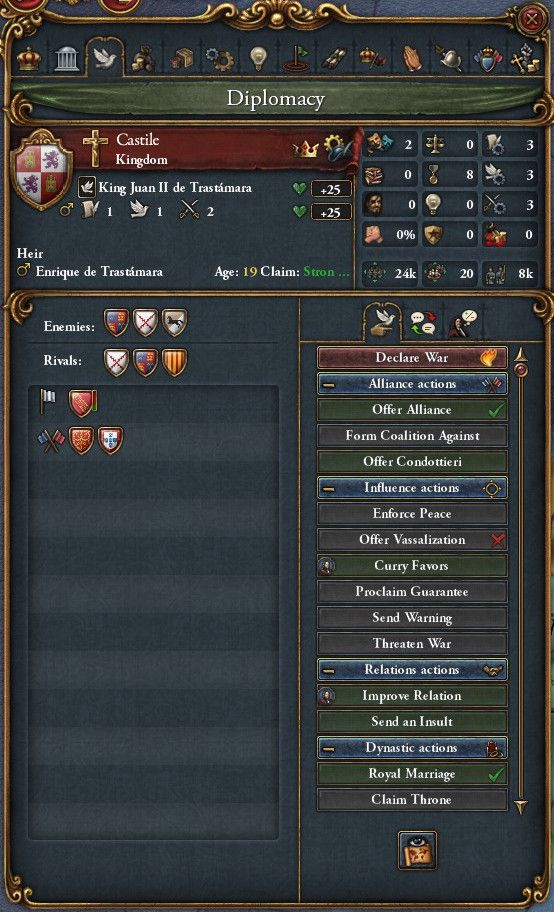
This is the diplomacy screen, where we declare war and also engage in various less consequential acts. We’re looking at the screen for our neighbor Castile, which is showing us a lot of useful information (the size of their army and navy, their technology level, their alliances, etc.).
On the right is a list of all the ways we can interact with them. We need to send one of our diplomats to achieve anything. This occupies that diplomat for a while - sometimes just for a few days while he delivers a message and returns, though other times he’ll need to stay for a lot longer.
Here, I want Castile as an ally. Look at that pretty green checkmark next to the alliance option! France and Castile are both united in their bitter hatred of the English (whom the Castilians have declared rivals as well), so it comes naturally.
Maintaining alliances is another critical element of EU4. Usually, you want to get lots of powerful allies like Castile, but at a more advanced level sometimes it may be useful to form an alliance with a weak country - to check a rival’s growth, for example.
There is a limit on how many diplomatic relationships (allies and vassals) a country can have at once - four by default, but the French Strong Duchies estate privilege gives us three more. Castile is actually our eighth, which is as good a time as any to introduce the concept of a soft cap. EU4 has a lot of soft caps, meaning you can exceed those limits at a cost. Here, our alliance with Castile will cost us one diplomatic power per month - a steep price, but worth it.
The rest of our diplomats are going to be busy. I need to raise the opinion of my vassals, who will need to be in love with me before I can absorb them. I also start building a spy network in Aragon. My goal is to capture the Catalan lands before Castile and Aragon unite, and since I don’t have a valid claim to that land, I’ll need to dummy one up before I can invade.
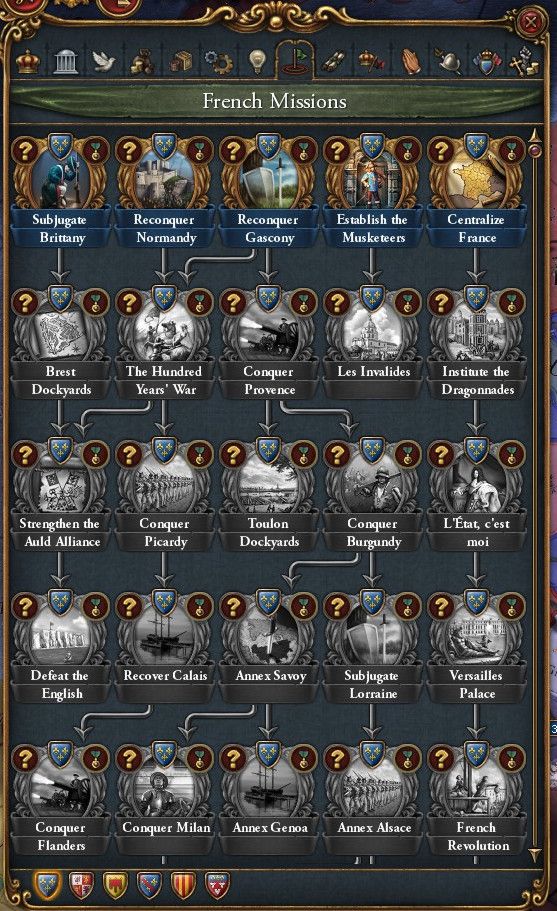
Missions
Missions give you some direction through the game and some historical flavor. Most mission trees are very simple, but the expansions turned the trees for some of the larger countries into labyrinthine nightmares. France has an especially messy one - I can barely make sense of this, and I’ve played France before.
For a new player, the most important missions are the ones that give you claims on land. They typically arrange these in a line, so that when you’ve captured all the land in area A, you unlock claims on area B; capture that area and you get claims on area C, and so on. We’ll begin by reclaiming all French land in non-French hands, starting with Normandy and Gascony, the land held by England.
We’re now ready to unpause the game. EU4 is technically a real-time strategy game, but it is pausable and we can set the speed to one of five settings. I usually start with the speed at level three, lowering it to two if I’m in a complicated war and raising it to four if things get boring.
Not that boredom is an issue with France, as we won't have to wait long for our first complication.
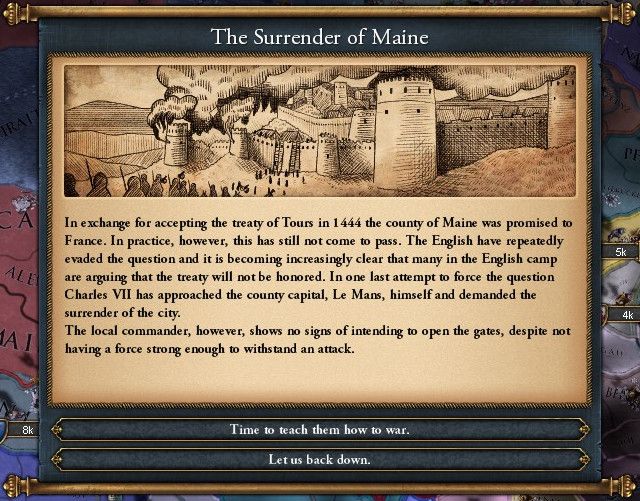
This is our first historical event, representing the closing phase of the Hundred Years War in which Henry VI conceded Maine to the French, only to promptly break a truce and try to take it back. France gets a lot of events like this, but this is the first and one of the most substantial ones.
Many historical events are dynamic and are a big part of what makes games of EU4 unpredictable. If you're not interested in this (it's not directly relevant to gameplay), skip to the next section.
Historical events rarely occur on a fixed date - they will happen either immediately when triggered or a random amount of time after certain conditions are met. In the wiki, many events are defined by a mean time to happen (MTTH). There is a probability of said event firing each month. The Surrender of Maine is one such event, but as it is available from the start of the game and the odds are very high, it almost always happens within the first year of the campaign.
Other events with lower odds are less predictable - they may happen long before the MTTH, or long after. Some can even time out and cannot happen at all if the game reaches a particular date before they fire.
There’s also a hidden X factor here: England’s decision. If I had played England, we would have been given the choice between relinquishing Maine as promised or going back on our word and kicking the decision to France. Since I picked France, the computer made that decision instead. Choices like this are random but are also biased so that each country usually does what it did historically, so the above is the standard result. There is a slight chance that King Henry would have opted to give up Maine to avoid a war. Having played ahead in this campaign a bit, I can tell you that there have been quite a few ahistorical decisions by the AI, and this is already reshaping the map in interesting ways.
We will not pass up the opportunity to fight the English. Picking the first option plunges us into a war (a rare time when a war starts by event rather than by sending a diplomat) using a special casus belli. There are many types of wars, depending on the pretext used to justify them. This is technically a “Restoration of Union” war with us as the defenders, meaning that we may end up forfeiting our sovereignty if we lose badly enough. Fortunately, this is an incredibly easy war and the only question is how much we’re going to get out of it.
EU4 is a war game at heart. This is not Civilization. You cannot hide from the world and quietly build rocket ships. The game brought you here to conquer. Combat in EU4 doesn’t have much of a tactical layer, so all you’re doing is making the big-picture moves.
Combat
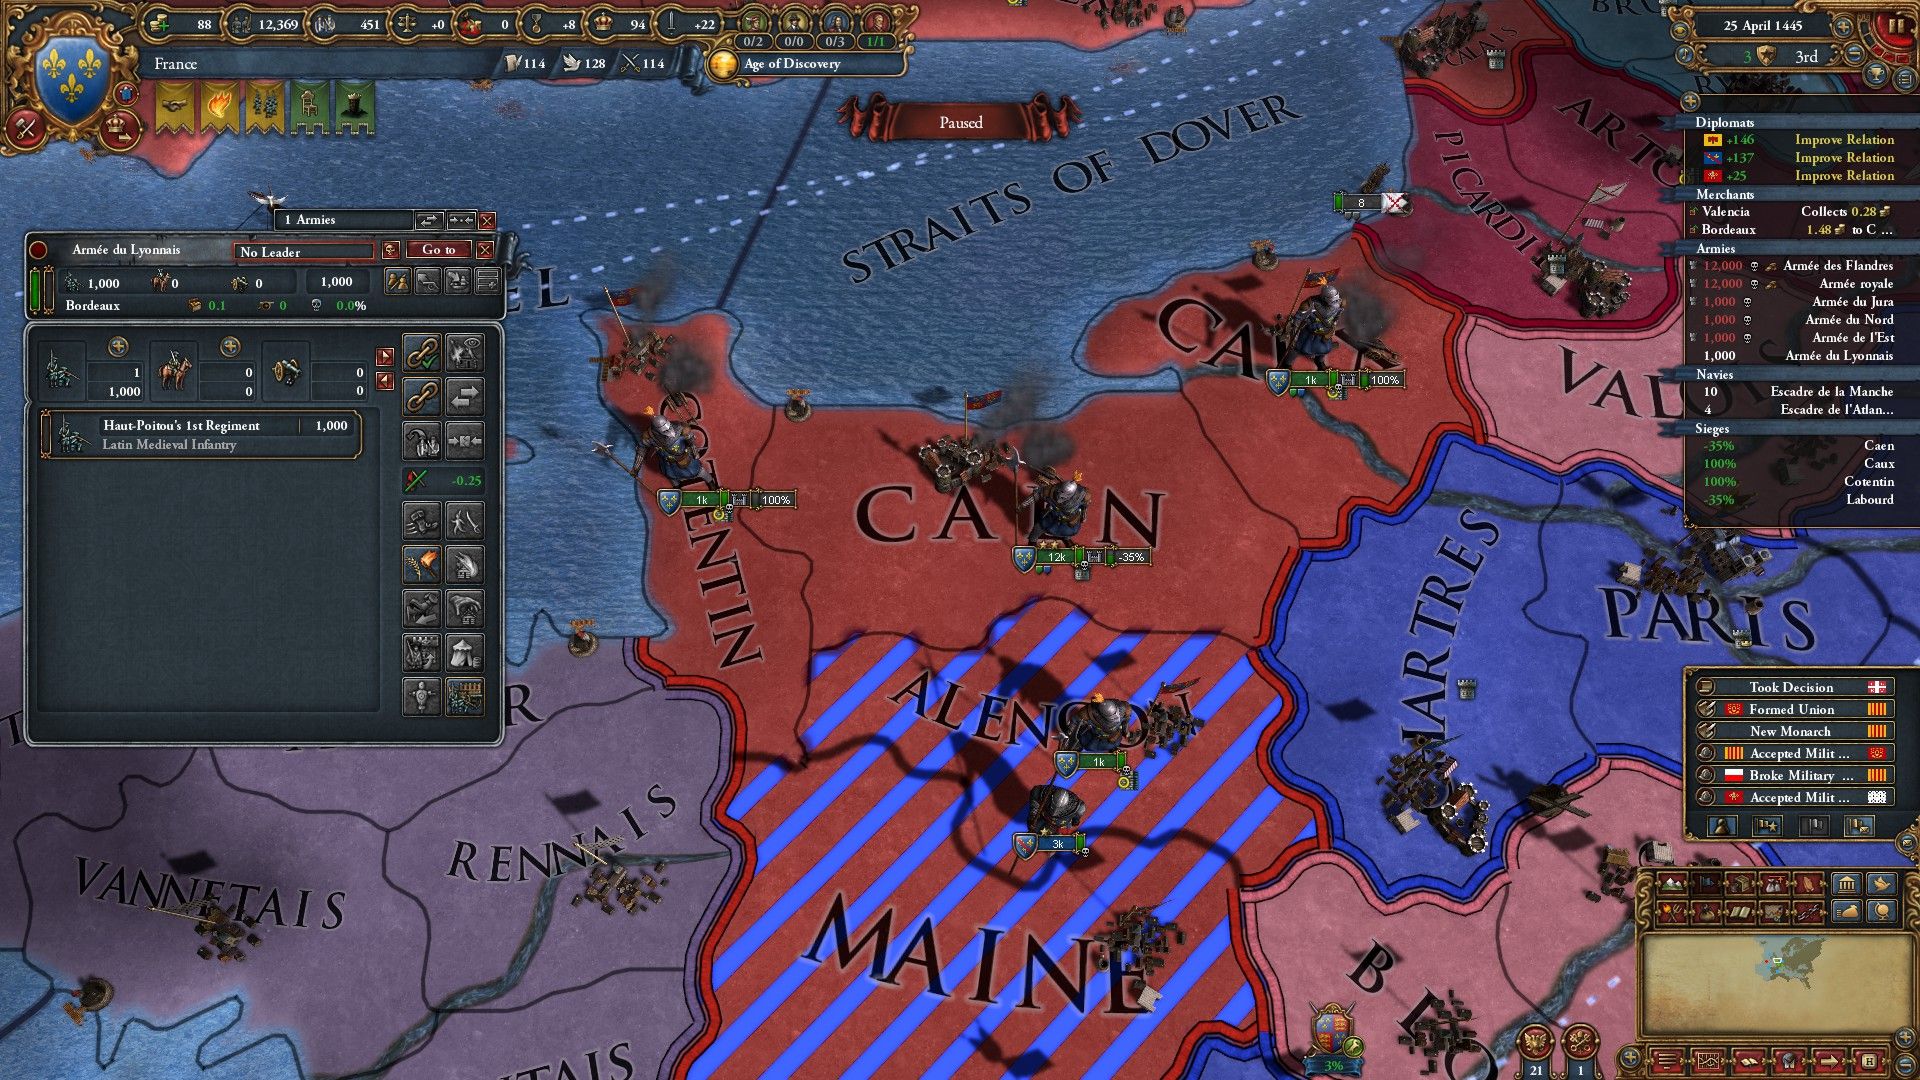
There are two basic layers to combat: Siege (the slow, boring part) and field combat (the scary, unpredictable part). There won't be any field combat in this war, so let's stick with sieges.
War is about controlling land, so that’s what we’re going to do. Move your troops into your opponent’s territory and you’ll automatically occupy it. Note that two of my units have the number 100% next to them. Unprotected provinces can be occupied in a single phase (30 days by default) by a single regiment, which prevents the enemy from making use of that land until they take it back. If the enemy territory is unprotected, we can split up our armies and capture a lot of land quickly, a practice known as carpet capturing.
Caen is going to be more difficult. Note that the number next to that army shows -35%. That’s because a fort protects Caen, and we have to besiege it before we can occupy that province. In each phase, we have a chance to advance the siege, making that percentage go up. Once the number is positive, we have a chance in each phase to win the siege and capture the province. The likelihood of advancing the siege (and thus the time the siege will take) varies based on many factors, including the quality of the fort, the local terrain, the amount of artillery in the besieging army, the skills of the general leading that army, and the attacker’s technology level. This early on, it will usually take 6-9 months to win a siege.
Forts are important but tricky to use well. Besides protecting the province they’re in, they also exert a zone of control that stops hostile armies from just walking by. They can even recapture occupied provinces that are within that zone. However, they also don’t fight back. An enemy with enough soldiers to besiege a fort will eventually capture it. They don’t stop invasions, they merely slow them down. Further, forts are the only building type that requires maintenance, and it’s not cheap - you could hire and maintain a few regiments for the price of one fort. Therefore, forts are best saved for strategically important locations such as your capital, chokepoints around mountains and straits, long borders, and remote areas not easily reached by your land forces.
The Bargaining Table
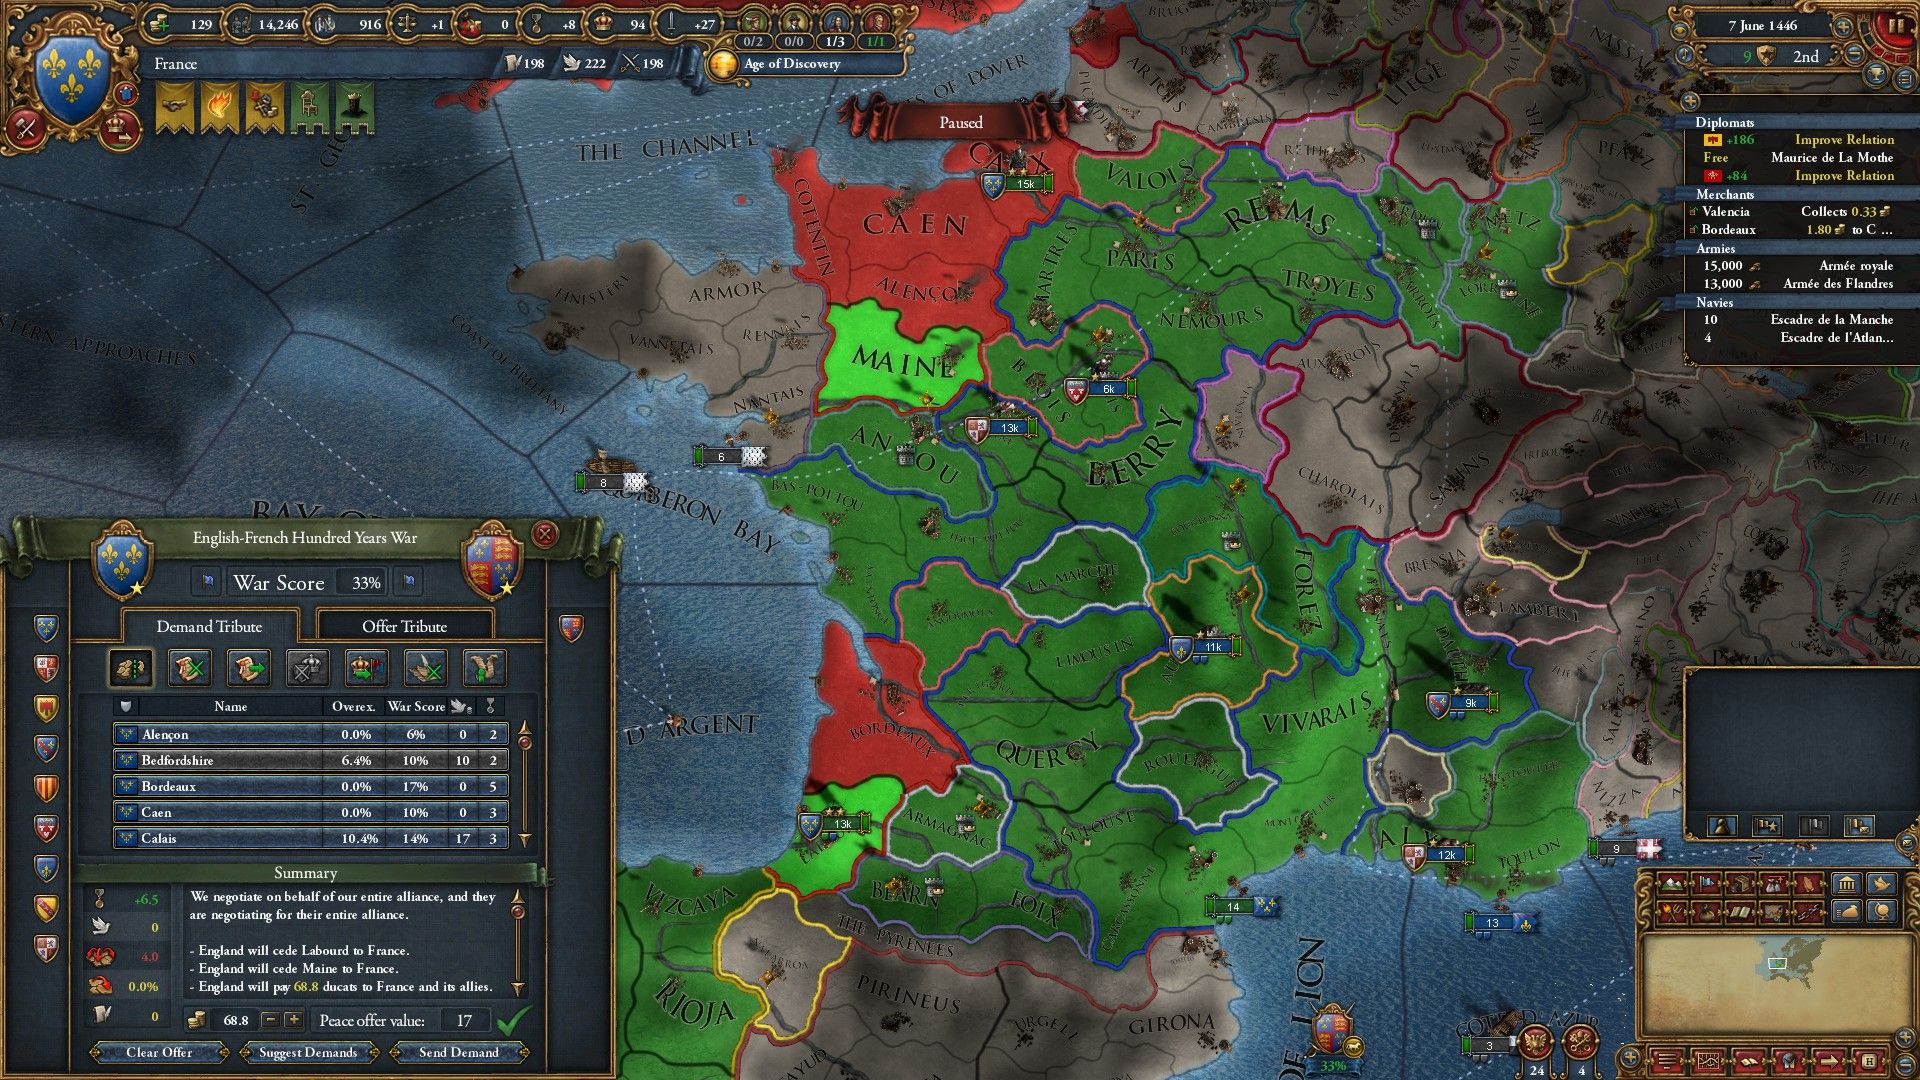
Once we've captured all of England's mainland forts, we can go to the bargaining table.
Here’s another difference between EU4 and most 4X games: We do not own what we’ve captured until after we’ve hashed out a peace agreement. What you can get is based on your war score, which you build by capturing land, winning battles, and completing objectives (in this case, keeping Paris safe). On the peace screen, we can make demands (or concessions, if we’re losing) for land or various treaties, all of which have values attached to them.
This is one of those areas where EU4 gets really confusing, even if you know what’s going on. Peace isn’t quite a one-to-one deal. You may notice that I have a war score of 33, but I’m only making 17 points worth of demands because this is the most I’m going to get. Why? The computer accepts or declines based on a range of factors, including the length of the war, their current strength, and the strength of their allies. If the enemy thinks they still might win, they will be reluctant to relinquish anything at all. If we’re really beating them down, they might actually give us more than the war score (though never over 100 points worth in any circumstance).
Since England's superior navy is going to prevent us from crossing the Channel and capturing London, this is as much as we're going to get for now. It's all right - I can come back for more later. Agreeing to peace means a truce, and we can't declare war again until it expires.
While we wait, there are other things we can do. I launch a war against Aragon and conquer part of Catalonia, which will weaken Spain just a little when it forms, but will cause me some short-term problems. We also see some unusual events in Eastern Europe - Moldavia opts to assert its independence from Poland, while Poland rejects the chance to form a personal union with Lithuania. These are both rare decisions on the computer’s behalf, and it’s surprising to witness both in a single game.
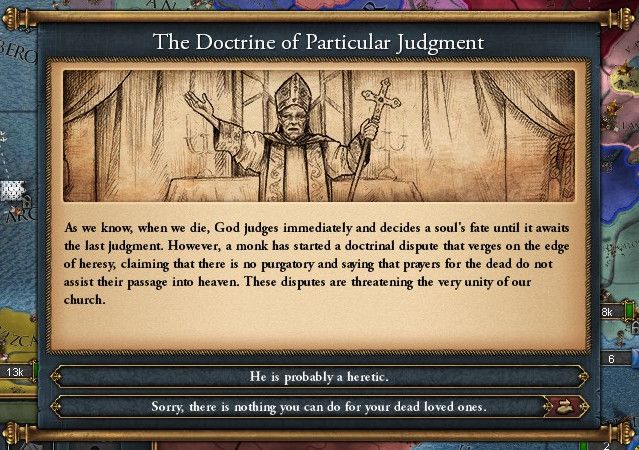
We also get some non-historical random events. Some of these are generic and happen to everyone, while others are narrower, affecting only countries with certain government types, religions, cultures, or upgrades.
As you may have guessed, this event is unique to countries with Catholicism as their state religion. It's an event linked to the Reformation - picking the first option will slightly accelerate it, while the bottom option will slightly delay it. The little red icon on the bottom choice means that this one will have an effect in a specific province; clicking the icon will take you there.
Institution Events & Unrest
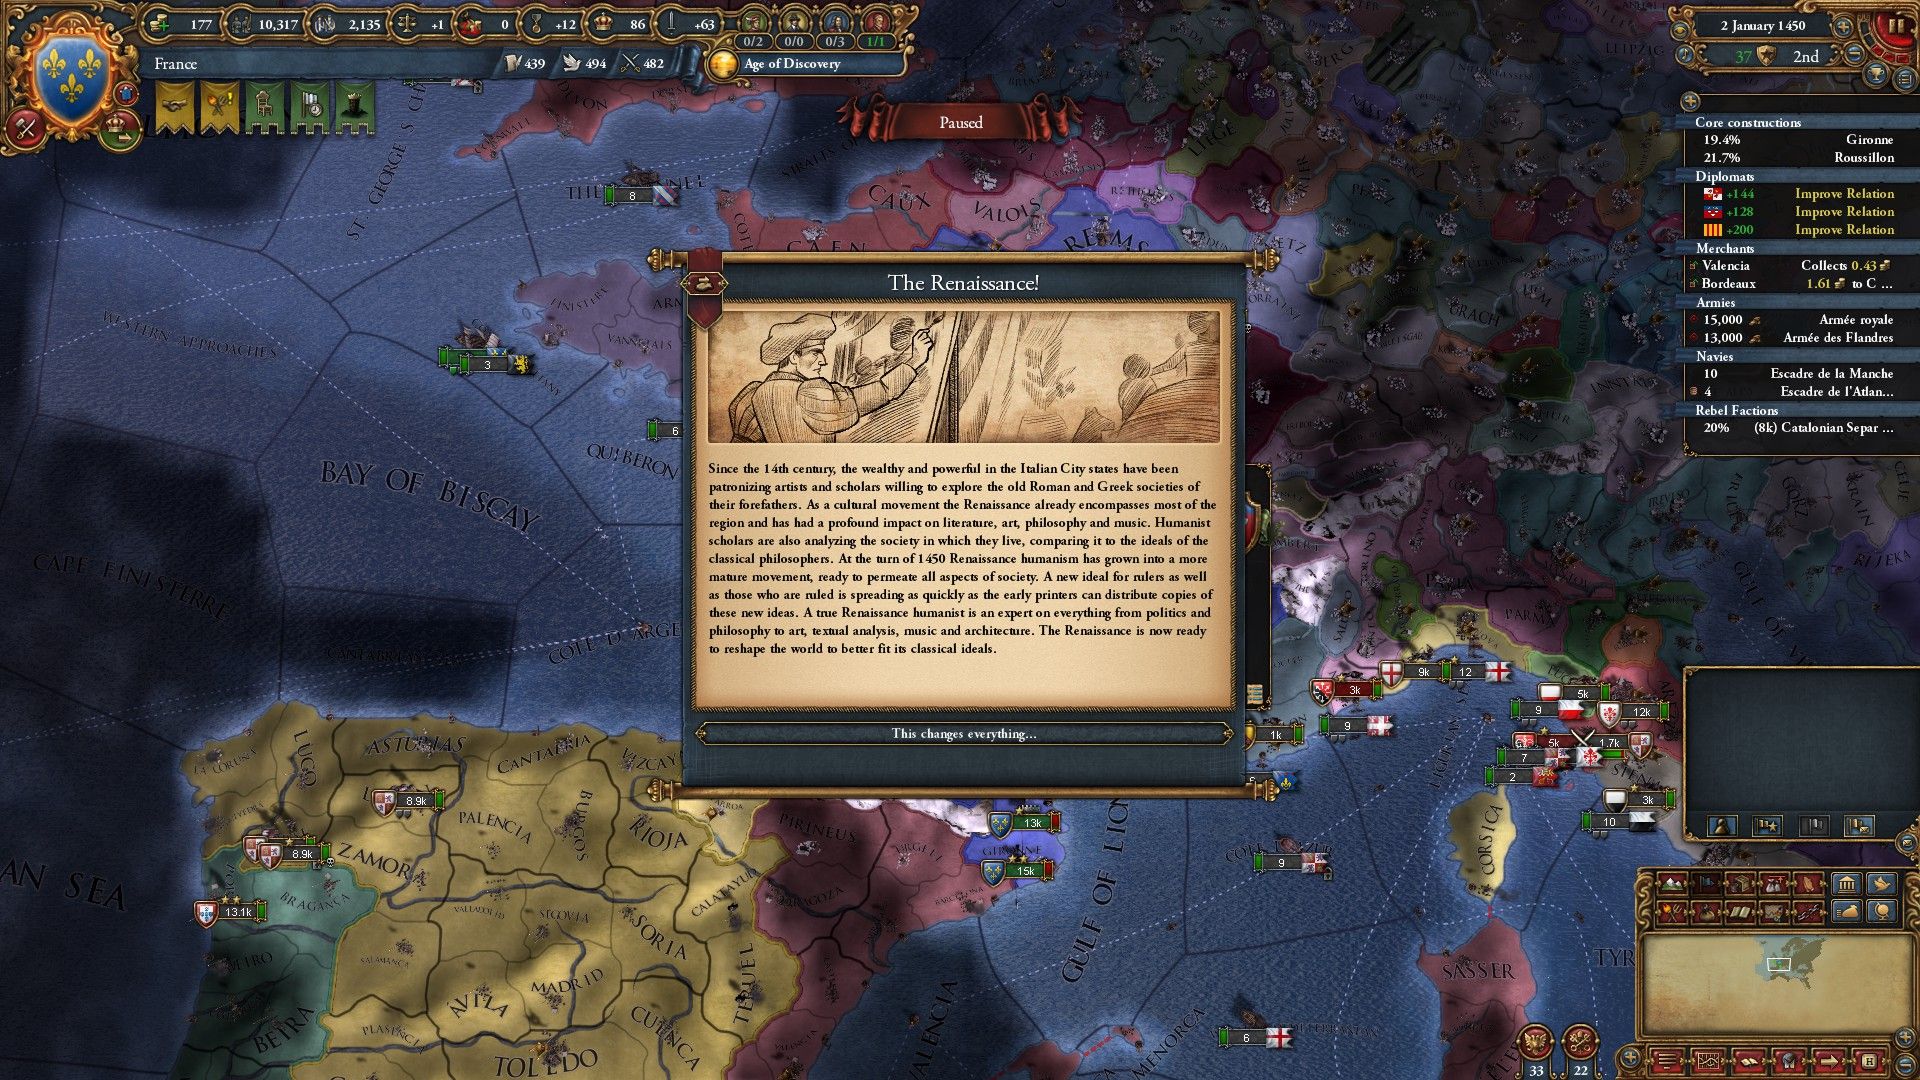
Before long, we get our first institution event. Institutions are world-changing ideas that will spawn into the world about every 50 years (sometimes later, since this is another type of event that only triggers randomly when eligible). Institutions will spread from their point of origin, and until we embrace them, we’ll suffer a penalty on technological development.
I won't go into too many details on institutions here. Understanding them is much more important if you're far outside of Western Europe, as they will usually spawn somewhere in Europe - in fact, in an unmodded game, the Renaissance can only spawn in Italy.
There’s one other thing of note on this screen. See that yellow alert flag with the pitchfork and torch? That means we have unrest in France. Unrest can be global or provincial, and various factors can cause each. Here, it’s separatism, a common source of unrest after a recent conquest. The Catalonian provinces don’t like being under my control and want to break free. If I do nothing, eventually a red alert flag will show up, showing that a rebellion is imminent. Ignore that one, and we’ll be forced to put it down by force.
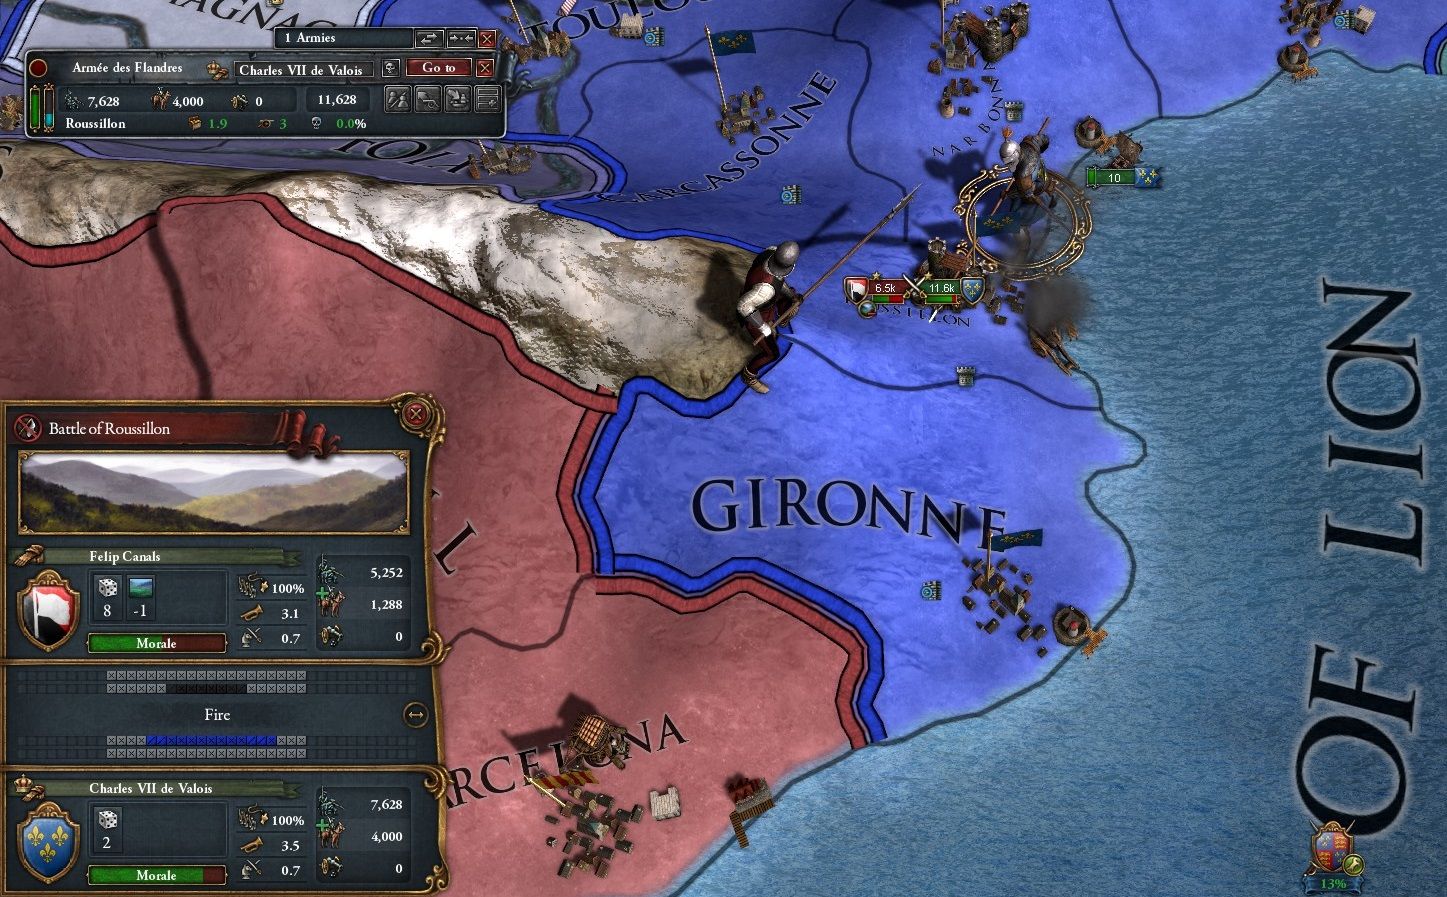
As long as we’re dealing with those Catalonian separatists, I can talk about field battles, the other layer of combat. Field combat starts when two hostile armies - such as this rebel army and my French army - move into the same province. It continues until either side gets wiped out, or (much more frequently) one side experiences a morale failure and retreats.
The window at the bottom left shows the two armies, both of which have been arranged by the computer for maximum combat effectiveness. There are three main types of regiments in EU4, which appear in the standard formation of the early modern era: a column of infantry in the front, cavalry to the flanks ready to perform double envelopment, and artillery in the rear. Everything is automatic once a battle starts and the only thing you can do to sway the outcome is to send reinforcements.
At this phase of the game, field combat is a straightforward affair. The largest army almost always wins, with a skilled general or an edge in military technology tilting a close battle. As the game advances, the number of combat factors one has to keep track of increases, and field battles become harder to predict. Even a victorious field battle can seriously deplete your reserves and leave you open to a brutal counterattack, so be cautious when engaging the opponent.
This is an excellent opportunity to learn how to read the computer’s actions. The game's AI is very risk-averse on both strategic and tactical levels. It won’t start a war it isn’t sure it will win and won’t fight a battle unless it’s equally confident. It strongly prefers sieges to field battles and will avoid fighting in the field unless it has an overwhelming advantage. If the computer’s forces hold their ground when you approach or chase your forces down, this means you are fighting at a disadvantage and should reassess the situation.
This is my relatively brief introduction to Europa Universalis IV. Note that I still left a lot of unique features out, such as trade, naval combat, ideas, and a lot of the weird little mechanics introduced by DLC. Keep your eyes peeled for another guide!
Join the conversation
What do you think? Reply below to share your perspective.