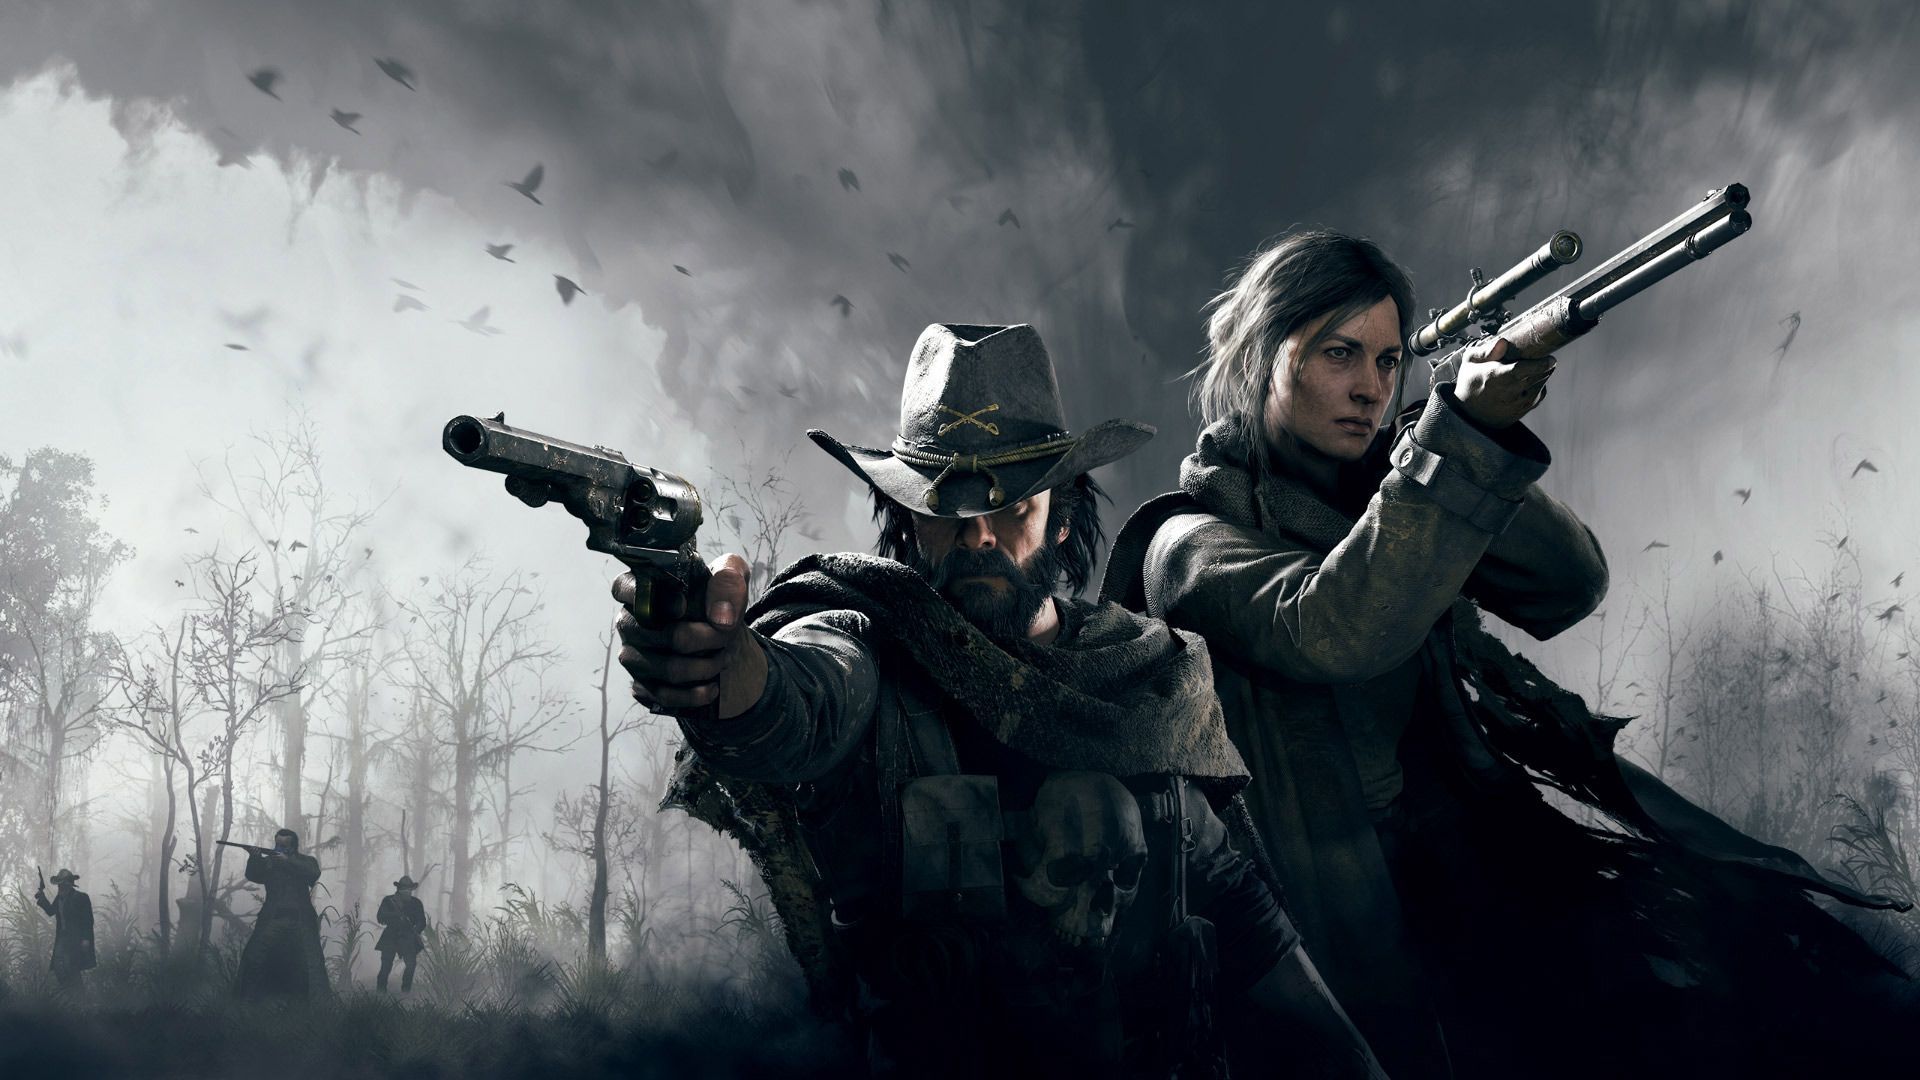
The Hunter’s Manual
A ‘Hunt: Showdown’ Guide to help new players navigate the deadly bayou

With free weekends and content bringing a huge influx of new players to Hunt: Showdown over the past few months, I thought it was important to give new players a helping hand.
For those curious as to what Hunt: Showdown is, I encourage you to check out my review. Its hardcore nature and other traits may turn new players and prospective buyers away. However, I’m here to stress that this game is worth the purchase.
This is a comprehensive guide to provide you with everything you need to know to get you started on your bounty hunting life in Hunt: Showdown.
Below is a list of the topics covered for convenience, feel free to skip to specific sections:
- Pre-game (Menus and loadouts)
- Monster Hunting Guide
- Starting the Game (Finding clues, killing bounties, banishing, and extraction)
- Progression (Blood Bonds, Bloodline, and Traits)

1. Pre-Game
Let’s start in the same place you’ll start when you first load up the game. The menus in Hunt can be a little confusing to navigate, but once you’ve got the hang of it, you’ll be a lot more comfortable with the game.
Here you will browse Hunters and shop for new equipment to take with you on hunts. In Hunt, if you die in a match then you’ll return to the menus and lose your Hunter and the gear with them, therefore it’s vital that you understand what you’re bringing with you and how they work.
How to customise your loadout
When you load into Hunt, go to the ‘recruitment’ tab. Here you will find the basic Hunters you can recruit, with better tiers unlocked as you progress.
You may also notice the ‘Legendary Hunters’ tab. These effectively work just like skins in other games but are separate Hunters. Although they are unique, Legendary Hunters offer no competitive advantage.
You’ll want to start with the basic tier I recruit, which is always free. Even if this isn’t your first match, the free tier I Hunter is always an excellent choice as there’s little investment and you can always customise your loadout.
As you are customising, there are a few essentials that you should always try to have on you:
- Medkit: Vital to keeping yourself alive out on hunts, allowing you to heal segments of your health bar. Cannot be used to heal damage taken from burns (will be displayed on the health bar as a singed effect). An alternative to a medkit is the healing syringe.
- Knife: Can slay monsters (and other players alike) without making noise. You’ll be using this knife extensively while roaming the map.
- Poison syringe: Protects you from the poison status effect, which drains your health. The ‘weak’ poison syringe will grant you poison immunity for 15 minutes, and 60 minutes for the upgraded syringe. Poison can be inflicted from a variety of sources (i.e. traps laid by other players and Hive AI monsters).
The following are not vital to surviving out in the bayou, but will certainly help:
- Dynamite or grenades: Perfect for those willing to take on players that are hiding in a building like a fortress, or for catching them by surprise. Just chuck one in and wait for the boom.
- Firebomb: You can throw a lantern found around the map or a handy firebomb on a corpse to burn it so the person can no longer be revived.

Weapons
Each hunter can carry a primary and a secondary weapon, but this doesn’t have to be the main weapon/sidearm combination like most other FPS games.
In Hunt there are three categories of weapons: small, medium, and large. Small weapons are typically sidearms and the hand crossbow. Medium weapons are improved sidearms, dual-wielded sidearms, or sawn-off shotguns. Large weapons are rifles and full-length shotguns.
Your primary weapon can be a large, medium, or even a small weapon. Conversely, your secondary weapon is restricted to small weapons except for those with the Quartermaster trait, which allows you to equip a medium weapon in the secondary slot (I explore Traits later on).
Once you are armed and equipped with the necessities, you’re ready to get into the hunt.
Combat ready
Hunt’s core game mode is Bounty Hunt, but there is also Quickplay, a more casual mode with no risk to losing hunters or gear, where players fight over a Wellspring to score points.
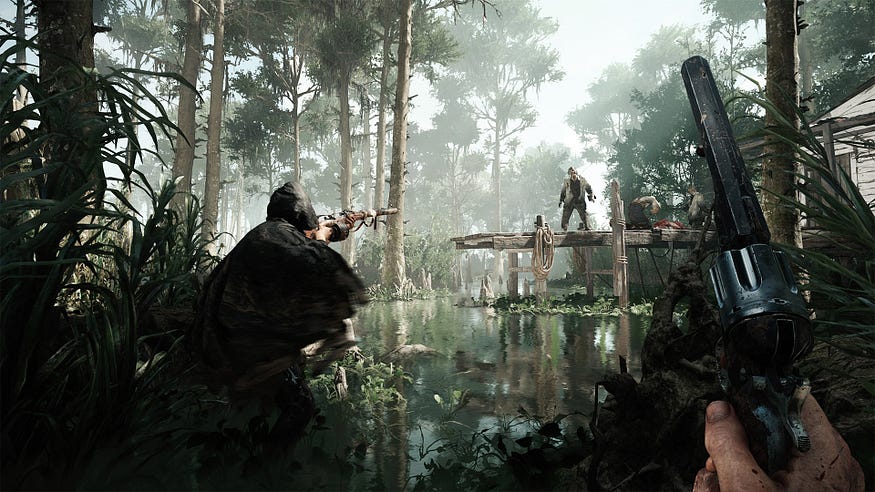
In Bounty Hunt, up to 12 players, whether solo or in teams of two or three, must compete to secure the bounty target(s) using Hunters they’ve geared up. These hunts will take place in a relatively large arena set in the bayou of Louisiana, populated by AI monsters that attack without discrimination. Each arena has several compounds which are clusters of buildings that make up an area of interest (i.e. a fort, a church, a village, or a workshop).
It’s within these compounds that the bounty target(s) will be hiding.
These bounty targets are AI boss monsters. Currently, there are four bounty targets you can encounter on hunts: the Butcher, the Spider, the Assassin, and Scrapbeak.
Some hunts will only have one contract (meaning there will only be one boss to hunt) while others will have two contracts (two bosses to hunt). The major difference to look out for is that if there are two targets, then the map will have a dividing line on it to signify which zone will have clues for each boss.
Find, kill, and escape with the bounty from the boss to be successful. However, you can escape (leave the match) alive by heading to an extraction point at any time.
Staying quiet means staying alive
Sound is important in this game. Every action makes a distinct sound, from walking and running, to opening gates and climbing ladders, or shooting your gun. The AI monsters even have audio cues for their AI states: passive, alert, fighting, and dying.
Hunt’s perfect binaural audio and sound design means other players can clearly and confidently pinpoint your location from great distances, depending on the actions you take.
To stay safe, you will want to be as quiet as possible. Here are some tips to minimize the sound you make in the game:
- Avoid firing your weapon unless completely necessary. Use your knife.
- Avoid running when near compounds, rather crouch and sneak your way around.
- Avoid the triggering ‘sound traps’ when navigating the bayou, such as crows that will squawk and fly away, dogs that will bark, and chains dangling from ceilings that will clank if you make contact.
Letting other players know where you are can give them the upper hand. In Hunt, giving the enemy the upper hand could be the last mistake you make.
2. Monster Hunting Guide
Hunt has several types of AI monsters that you’ll have to contend with as you navigate both the Louisiana bayou and the constant threat of actual players.
These AI monsters should not be overlooked, as they can be deadly, particularly for the uninitiated. All too often do I see a new player try to knife or shoot an Immolator, only for it to enrage and rain down hellfire on their poor Hunter.
- Infected Grunts: Basic monsters found in the game, they are your traditional zombies. Aim for the head and preferably with a knife to stay quiet. We can find them in small groups of two or three. There are different variations of this enemy. For example, some will carry torches to set you alight, burning your health bar. There’s also the doctor grunt which deals poison damage with a rusty bone saw but does drop medkits when killed.
Then there are marked enemies, which provide more of a challenge:
- Armoured: These are grotesque creatures that look straight out of Spore. These monsters are larger and have more health than the Infected Grunts. They can take multiple shots to the head and are resistant to blunt damage. Thankfully, your trusty knife will take them down in a few hits, but be careful of their melee. Sometimes it’s useful to attack and then step back before attacking again. There is also a variant of the Armoured. This variant is seen entangled in barbed wire, which will cause Bleed upon contact, including melee. It’s quieter to take them down with your knife quickly and stop the bleeding straight away.
- Hives: Hives are old ladies that send swarms of poisonous bugs after you that not only can cause damage, but obscure your vision. If you use a poison syringe at the start of the round, you won’t get surprised and poisoned as frequently. A few swipes of your knife can disperse the swarm covering your face, allowing you to see. We can take Hives down with a single knife attack or gunshot to their weak spot: their head.
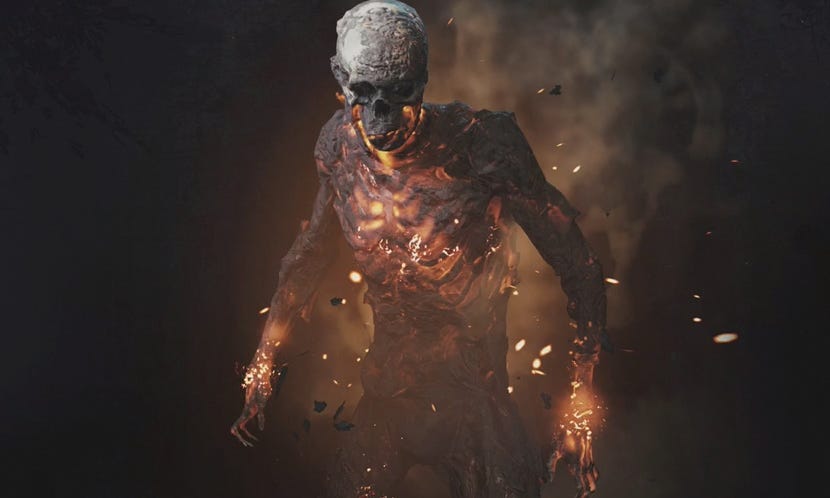
- Immolator: This monster is a raging inferno. They are fast and can be extremely punishing. Immolators have two states: dormant and active. In their dormant state, if triggered, Immolators will chase players. When they catch you, they’ll do quick blunt melee attacks (no fire damage, yet). Immolators will enter their active state when attacked with piercing damage (gunshot or knife attack). In their active state, they will run even faster and leave a trail of flames in their wake. Their attacks will now ignite players. An active Immolator will burn out and die after being enraged for 30 seconds. To fight an Immolator then, it’s best to avoid using piercing damage to avoid its active state. To take them down easily, melee attack Immolators with an equipped gun (as long as it doesn’t have a bayonet) or use knuckle dusters.
- Meathead: This hulking monstrosity is best left alone. Having no head, the Meathead uses leeches to find the player. If the player comes into direct contact with a leech, it will be alerted to your presence. While Meatheads are slow when inactive, they can be quite fast when they are barrelling towards the player performing a charge attack. I would avoid fighting a Meathead. Meatheads are especially weak to explosive damage and shotguns.
The final two AI monsters are pack monsters, meaning can be found in larger groups:
- Hellhounds: I would recommend avoiding Hellhounds since they can often overwhelm you and deal significant damage. They are faster than the player, meaning once they’re onto you, they force you to face them. Luckily, they have little health. To take them down, charge up a heavy attack with your knife and let loose when they’re within range.
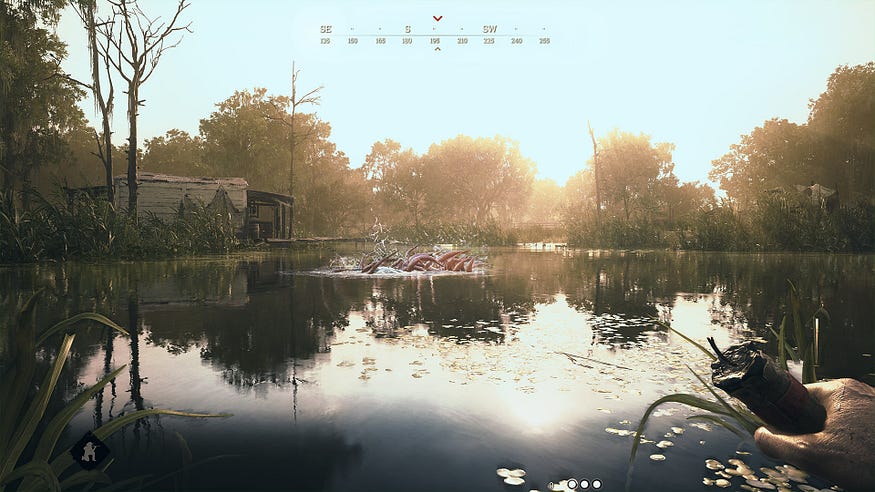
- Water Devil: We can find these truly terrifying tentacles in lakes and rivers. Being one of the most deadly monsters in the game, it’s best to avoid the waters if possible. If you step into water infested with these beasts, you have a few quick seconds until they hurtle towards you. A few shots should be enough to take out these Water Devils, but be aware that once you kill a Water Devil, it quickly respawns.
Now you know how to fight every monster, it’s time to get into a match and try your luck.
3. Starting The Game
Once you load into a match, you’ll spawn with up to two other players as teammates next to you. There are several spawn locations where you may find yourself, all of them along the outskirts of the map. After the countdown, you’re free to move around and explore the map.
Your goal is to find and kill the bounty target(s) in that match. You can see which contracts are active in any match by looking in the top left of the screen where they’ll be a small icon to represent each active boss.
To find the bounty, you’ll have to locate three clues to narrow down its location. The bounty will hide in one of the many named compounds on the map. You can find them without getting all the clues, but that approach is luck-based.
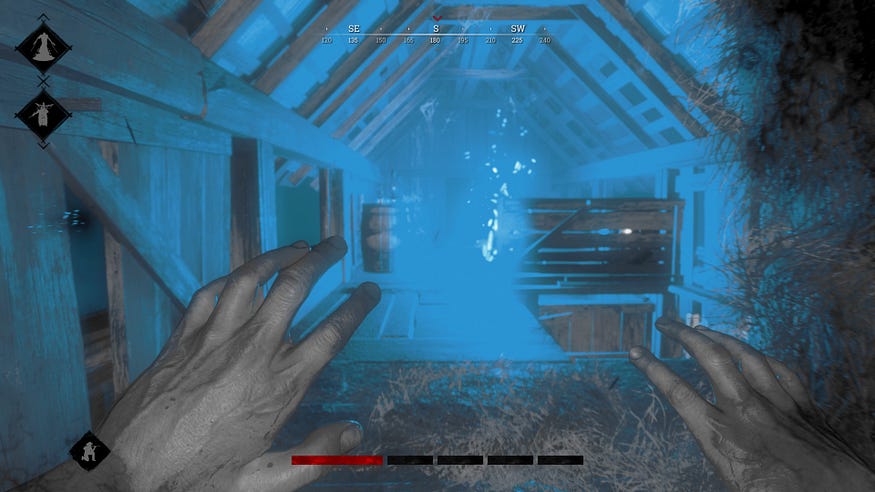
Clues are small glowing blue rifts in the ground that you can walk up to and interact with. Once you interact with three of them, the bounty target’s location will be marked on the map.
Clues are found within the compounds, but to find their exact position you will use Dark Sight. This ability lets you see noise, specifically the droning of the clues which will be highlighted with a blue glow. You will want to make your way to the closest clue as soon as the match begins, using Dark Sight and your map to guide you.
Pro-tip: The clue will glow red and make an ominous audio cue when an enemy player is within a 30m range.
Be careful because once you have picked up the clue, you will not be alerted. However, if the enemy hasn’t collected that clue, then they will still be alerted. Therefore, it’s good advice to hunt down the nearby players before collecting the clue, unless you’re planning on a mad dash away once you’ve collected the clue.
Once you have collected three clues, you will have your target’s exact location. Now that you know where the boss is, how do you go about killing it?
Bounty hunting
Each bounty in Hunt has unique strengths and weaknesses so it’s helpful to know what these are before heading in, despite there being one method that is best for all bosses.
The Assassin is a fast-moving pool of insects that can morph into humanoid form.
The Assassin is a big fan of Bleed damage with both their melee and ranged attack, inflicting Bleed on the player. Keep an eye out for their telegraphed attacks to give yourself time to dodge. Being a deceptive boss, they can create clones of themselves to trick the player. Try to kill them before they reach you or they will explode, dealing damage and obscuring the player’s vision. Once they reach around 1/4 health they will enrage, making them more powerful. They are weak to poison damage and explosives and can be staggered with a melee weapon.
The Butcher is a hulking pig-man decked out with a hook and a flaming torch.
Much like how the Assassin deals Bleed, the Butcher loves fire. Both their melee and ranged attack will set you on fire, which is one of the strongest effects in the game because of its permanence. Because of their affinity with fire, they are also immune to its effects. The Butcher’s enraged form allows him to run faster, wildly swinging his torch and leaving fire in his wake. To take him down quickly, use a melee weapon or explosives.
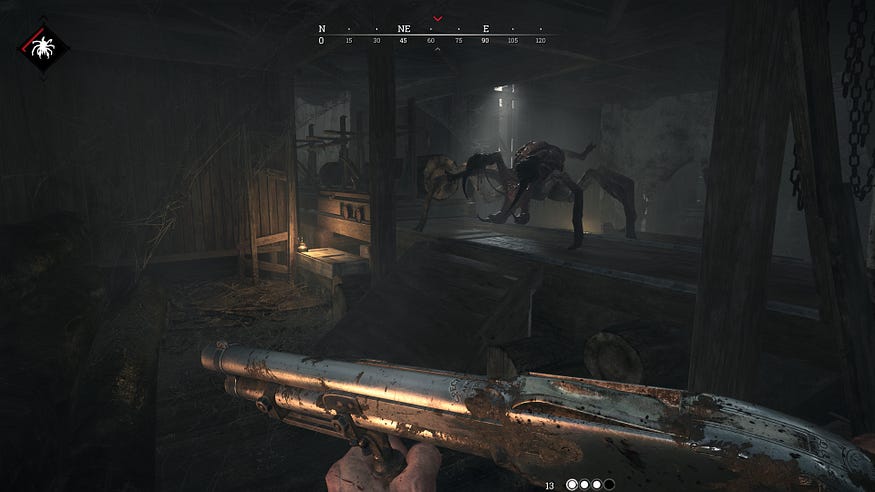
The Spider, one of the most disgusting creatures in the game, can keep players nervously guessing.
Their main attack is a pounce, which is announced by a screech. Dealing enough damage to the Spider will interrupt it before it has time to attack, however. Their ranged attack involves spitting out a poisonous cloud at the player. Much like the Butcher, the Spider is immune to its own element (i.e. poison). Thankfully, the Spider can be killed quickly using fire (such as fire bottles, lanterns that can be found nearby, or explosives). They’re also weak to blunt damage, making the sledgehammer an effective spider killer.
Scrapbeak is the newest and most complex boss of them all, known for its crow-like appearance.
This enemy has a unique backstory and lore, for those interested. This boss has both a melee and a ranged attack. Their melee attack will vary depending on the weapon they are currently carrying (ax, hammer, shovel, pitchfork). Their ranged attack is a special concertina bomb that will block off certain areas and damage players.
This fight can become more challenging when you realize the helpful items Hunters are used to finding in boss compounds (Medkits, melee weapons) are hoarded by this boss. They will drop these items when in a frenzied state. Direct gunshots to Scrapbeak will have it dropping a primed concertina bomb, so be careful. However, melee is the tried and tested method for taking this boss out.
While each bounty has weaknesses, there’s one method you can always rely on to take out a boss.
It turns out that melee weapons are the simplest and convenient tools for these situations, particularly because they’re quiet. However, not any melee weapon will do. Keep your eyes out for a heavy melee weapon that can be found around the boss’ lair, including pitchforks and large axes. These weapons can’t be stowed, but they will deal sizable damage to the boss while maintaining a stealthy approach.
Now I can’t leave out the more explosive approach players can take.
Making use of your firearms and explosives, including lanterns found in the compound, can also take down a boss quickly. Because of the inevitable noise involved with this method, it’s best reserved for those tricky situations where you’re trapped inside the boss lair with enemy players watching the doors outside. This is better if your focus is to neutralise the threat so you can focus your attention on the players.
Banishing
After the bounty is defeated, you must banish the boss. Interact with the defeated boss to begin this process. Once it begins, you and your team will have to wait until the process is completed to collect your bounty.
This is often the tensest portion of the match. The moment this process begins, all players will be alerted of your position and will move in to steal your hard-earned bounty. Your job is to stop them. Hunker down, lay traps, and watch the entrances.
If you’re in a group, your success can increase by splitting up to watch different parts of the compound. Everyone staying in one location can lead to easy pickings, especially if someone uses dynamite.
A helpful tip, once you become more familiar with the game, is to wait before beginning the banishing process. Experienced players kill the bounty and eliminate any rivals before beginning the banishing process. This leads to a safer and secure route to victory.
Extraction
Each bounty will drop two tokens after the banishing process. So if you’re in a team of three, then one person won’t be carrying one. Don’t fret, everyone gets rewarded. This portion of the game is simply about bringing everything to the extraction point to end the match.
If a player dies carrying a token, then it can be picked up from their corpse. This goes for both teammates and rival hunters.
Upon collecting the tokens, the players carrying the tokens will be marked on the map with a lightning bolt. So expect to be potentially challenged on your way to the finish line.
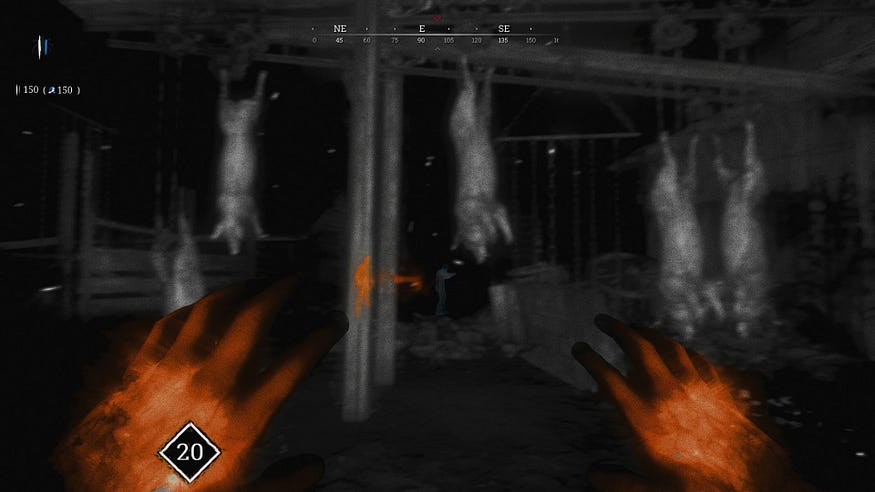
While holding a bounty token sounds suicidal, it comes with a trick up its sleeve: enhanced Dark Sight. This will let the players with tokens use Dark Sight to see enemy players through walls. It only lasts 5 seconds, so don’t waste it.
A rule I always go by is to use the first second of enhanced Dark Sight to check that the compound is clear before leaving, then save the rest for later.
If the area is safe, open up your map and choose an extraction point, marked by three lines around the outskirts of the map. The closest is quicker but beware, the closest extraction site is also the most predictable. Enemy players may be waiting, ready to steal your prize at the very last second.
Once you’ve reached an extraction site, group up in its radius and stay alive until the timer runs out and you’re extracted!
Well done! Your hunt is complete and will be handsomely rewarded for your efforts!

4. Progression
Completing a Hunt — whether you win, escape with your life, or even die — will reward you with Blood Bonds, account experience, and weapon experience.
Blood Bonds is Hunt’s main currency, used to buy higher-tier hunters and new equipment.
Account experience goes towards levelling up your Bloodline, Hunt’s long-term progression. Increasing your Bloodline rank will offer you a wider range of weaponry and higher-tiered Hunters to choose from. Once you reach rank 100, you can prestige to reset your rank and start again (you will keep any cosmetics, including any Legendary Hunters, but will have to re-unlock weapons and equipment).
Weapon experience is earned by getting kills (both AI and human) with specific weapons. This experience is used to gain the variants of weapons. For instance, if you use the Winfield M1873C you will earn experience with this weapon, leading to unlocks such as the Marksman variant (you’re equipped with a scope) or the Talon variant (adds a blade to the stock).
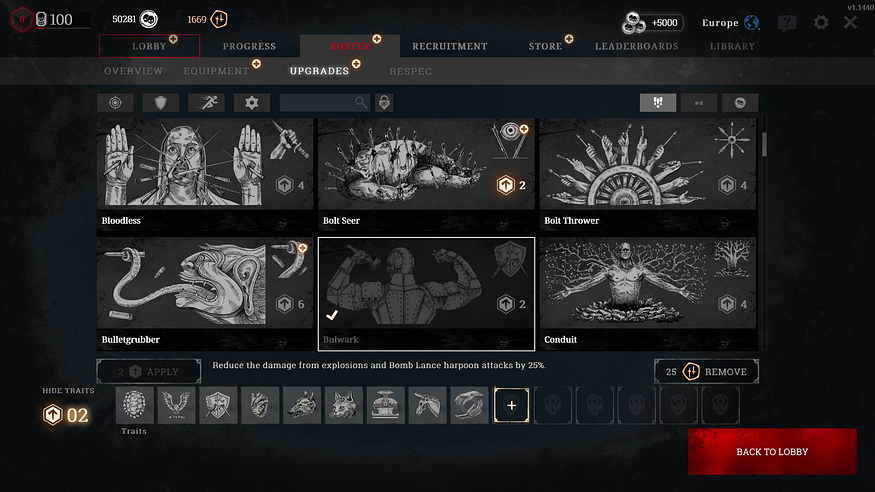
Surviving a hunt will award you Hunter experience, which will level up that individual Hunter. As your Hunter increases in rank, you will equip a variety of traits, giving you an array of positive effects (i.e. quieter movement, extra space for tools, or duel-wielding). These are powerful effects that can greatly help you out.
My personal favorites include Packmule (receive an additional tool or consumable when looting or opening item boxes), Determination (stamina recovery starts sooner), and Lightfoot (vault, jump, fall, and climb ladders silently).
These traits are locked to the Hunter they are applied to, meaning if you level a Hunter up and equipment traits, they will only affect that Hunter.
As is the theme with Hunt, death is costly. If you die, you lose that Hunter and any newly gained traits! At least until you level up another Hunter and do it all over again.
If you reach the max character level of 50, you will be able to ‘retire’ that Hunter. This will cause them to leave your roster but it will reward you with large amounts of Bloodline experience.
Happy hunting!
Hunt is a complicated game with a steep learning curve so I hope you found this guide informative and helpful as you go forth on your bounty hunting journey.
If you know anyone else new to the game, then share this guide and the knowledge within. More Hunters and more knowledgeable Hunters only make Hunt a better game.
So go forth and claim some bounties and take some names, Hunter!
Join the conversation
What do you think? Reply below to share your perspective.