Kaycee's Mod 101: The Basics
The essential guide to Inscryption's essential mod

The Kaycee's Mod update for Inscryption officially launched around three months ago, which is enough time to have either beaten it thoroughly or given up. While the basic gameplay doesn't appear to differ too much from the standard story mode, completing the game with challenges and without the little cheats in the core game is not easy. Clearing all the challenge levels requires the kind of underlying knowledge that takes dozens of hours of gameplay to suss out.
Allow me to save you dozens of hours. Here is my essential guide to Kaycee's Mod, with all of the little tricks and exploits you'll need to beat the game 12+ times and reach the true final boss.
Basic tips
- Don't stress too much over your starting deck. The three fixed cards in each deck give you a good starting point on a build, but you can always change your build and ditch those cards later.
- Keep your deck trim. Most viable deck builds are vulnerable to a bad draw, and keeping your deck as small as possible will reduce the chances of that happening. In most cases, you should avoid unnecessary draws and take every opportunity to remove unneeded cards.
- All else being equal, cheap creatures are better than expensive ones. While there are some powerful builds built around big, pricey creatures, a deck centered around low-cost creatures will be more reliable. If every card in your deck costs one blood, then there's little risk of a bad draw as you can always play something.
- Try to get creatures from a common tribe. There's no downside to using creatures from a specific tribe - no "canine killers" or anything of that nature. Tribes exist primarily to let creatures gain extra sigils, so specialize if you can.
- Try to defeat your opponent on the first turn. This may seem like a no-brainer, but it's actually critical to winning, especially with very difficult challenges like Single Candle. Some of the regular battles are sadistically unfair, with cards hitting the table faster than you can deal with them. Winning on turn one when the board is clear is your best bet.
- Plan your route, but don't over-plan. Unlike Slay the Spire, where you can see the entire map all at once, here you can only see a few rows ahead. Always aim for tiles you need and don't assume that any particular tile will show up. You're only guaranteed to get what you can see.
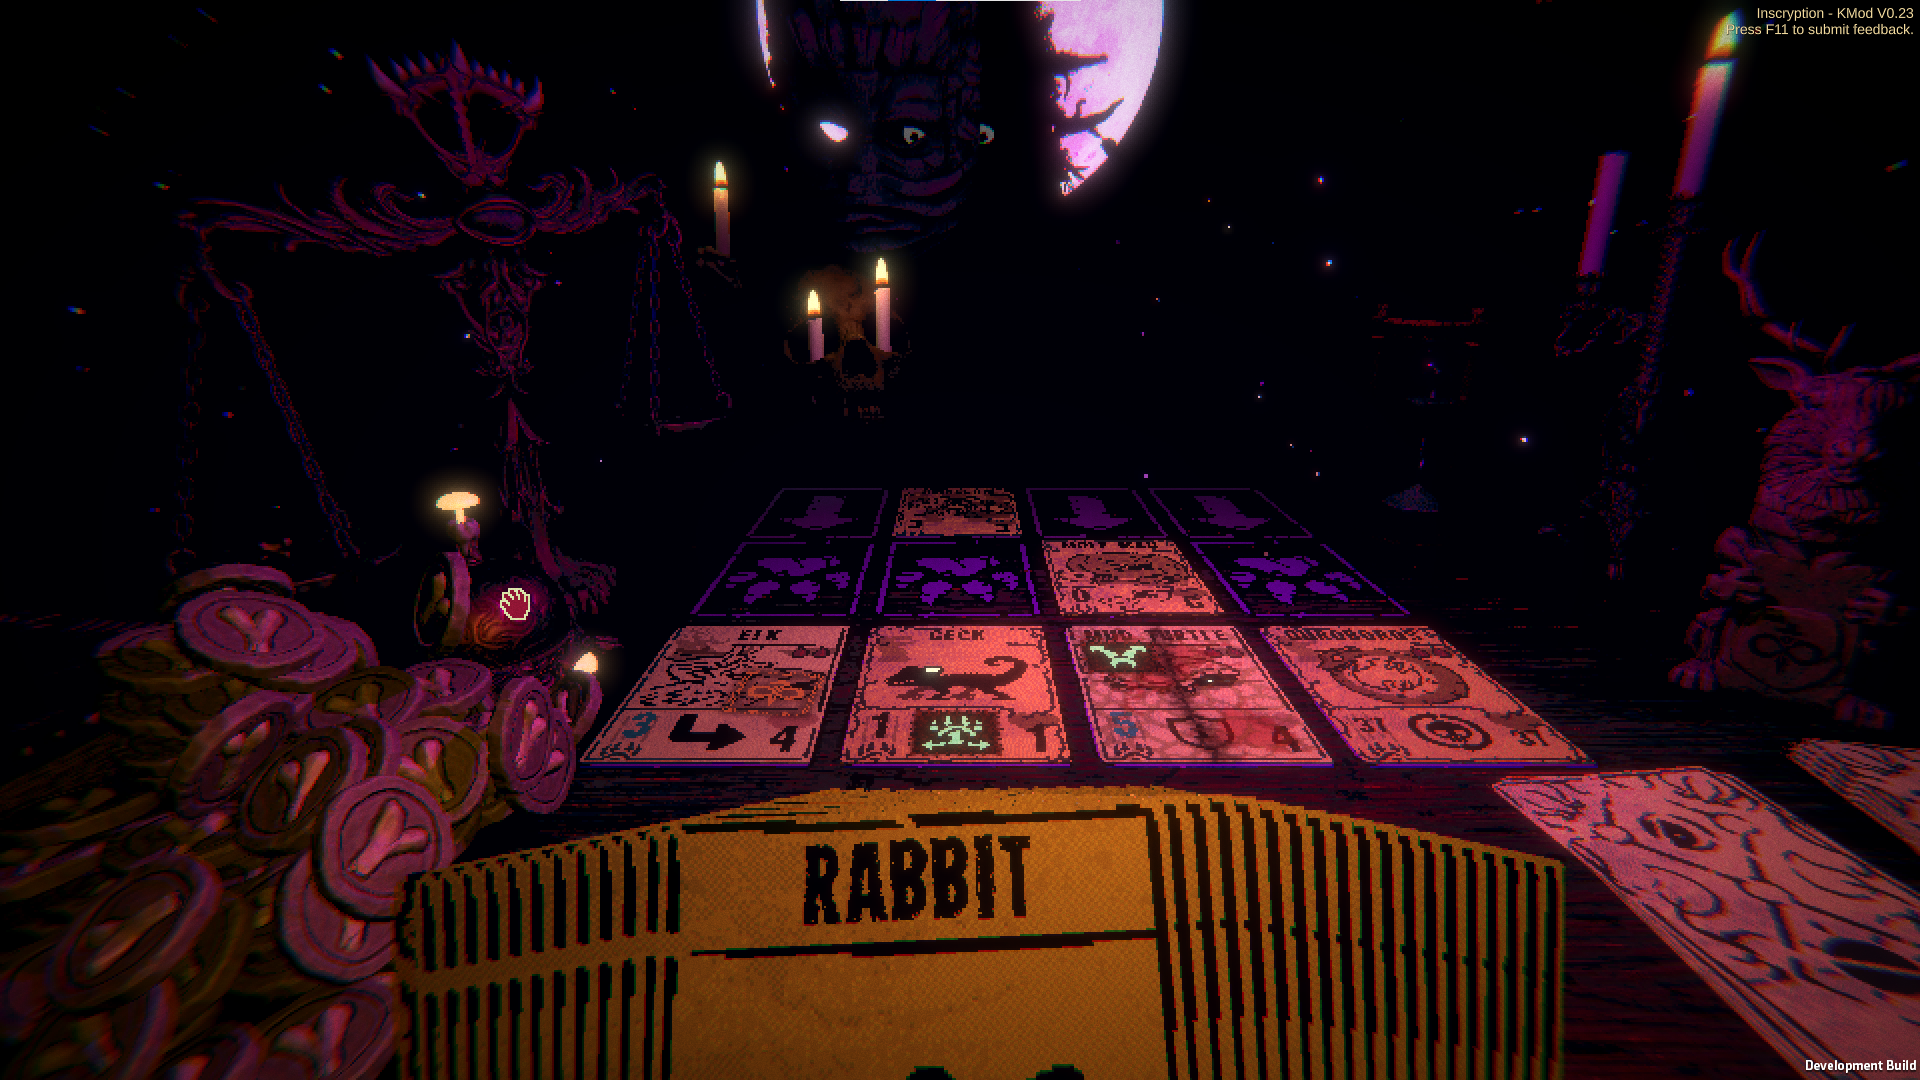
The maps
As with Inscryption's story mode, Kaycee's Mod makes the player fight through three full-length maps and then a boss, but there are a few tweaks. Most significantly, the first three maps are in random order, meaning that the first three bosses are also fought in random order.
While you'll likely be familiar with the basics of the game by the time you get around to Kaycee's Mod, it's worth taking a closer look at the different tiles that make up each map. Even without challenges activated, Kaycee's Mod is noticeably harder than its story mode counterpart.
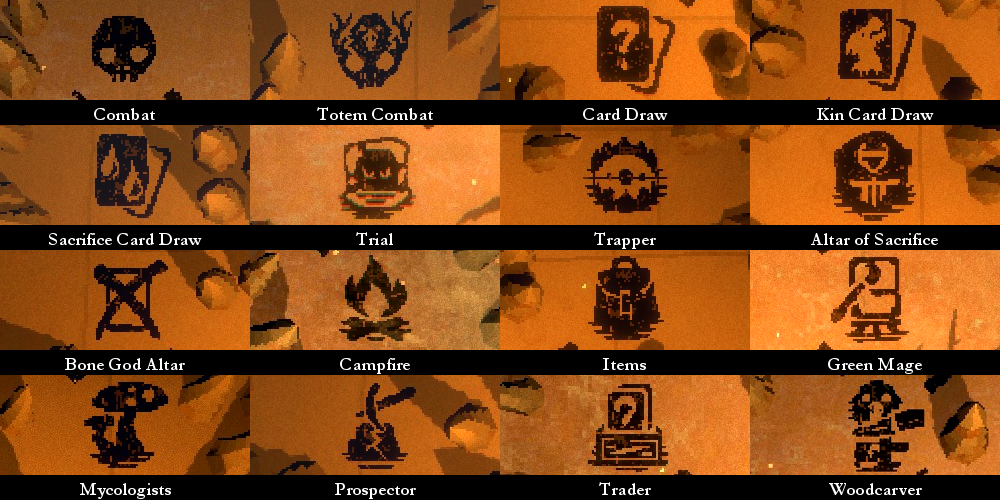
We'll start with a brief overview. Each row of a map is divided into three broad categories: Battles, Draws and Miscellaneous. This means that you'll always fight the same number of battles in each run and there's an absolute minimum number of draws. Here's a brief rundown of each tile:
Battle Tiles
Combat - Fight against a random deck.
Totem Combat - Fight against a random deck. The opponent has a random woodcarver totem active, granting a random sigil to cards of a random tribe.
There's no way to know what deck your opponent will have when you land on a combat tile, so they're all pretty much equal. A totem might make a battle a lot harder, but usually, the effect is negligible (especially if you win in round one).
Draw Tiles
Draw - The player must choose to draw one of three randomly chosen cards.
Kin Draw - The player must choose to draw one of three randomly chosen cards, seeing only the tribe of the card (canine, hooved animal, bird, reptile/amphibian, insect).
Sacrifice Draw - The player must choose to draw one of three randomly chosen cards, seeing only the cost of the card (one blood, two blood, three blood, any number of bones).
Unless you picked the No Clover challenge, you can redraw your possible cards once per tile.
There's no particular advantage to Kin or Sacrifice Draw tiles, they just make it harder to get the cards you want.
Trapper - The player can purchase animal pelts in exchange for gold teeth. These pelts can be traded later at Trader tiles for cards; they can also be played in combat (pelts have zero attack, 1/2/3 health, and can't be sacrificed). The Trapper always offers one Rabbit Pelt for free. The price of pelts increases on later boards.
If the player has an empty item slot, they may purchase the Trapper's Skinning Knife for seven teeth. This destroys a single enemy card and puts a pelt in the player's hand.
The Trapper is easily the hardest of the draw tiles to use well. Unless you are building a deck around Pelt Lice, there's no immediate advantage to having pelts in your deck other than using one to chump block and yield a single bone. They bloat up your deck and there's no way to get rid of them until you hit a Trader tile. That can be right away or not until the end of the run, depending on how your luck breaks.
Trial - The player chooses one of three trial cards. After selecting a trial, three random cards are pulled from the player's deck and their traits are compared against the trial card
The possible trials are as follows:
- Trial of Blood: Cards must have a combined cost of at least four blood
- Trial of Bones: Cards must have a combined cost of at least five bones
- Trial of Health: Cards must have a combined health of at least six
- Trial of Kin: At least two cards must belong to the same tribe
- Trial of Power: Cards must have a combined attack of at least four
- Trial of Wisdom: Cards must have at least three total sigils
If the trial is passed, the player must choose one of three cards, each of which has two added sigils. If the trial is failed, nothing happens.
Trials are the only draw tiles where you don't necessarily have to draw a card, which makes them the best draw tiles. Pick a trial that you're unlikely to win and you can keep your deck nice and lean. Even if you "lose" and have to draw a card, you'll at least get a creature with two bonus sigils that can come in handy when you encounter the Mycologists later on. Note, however, that you can't use the clover to redraw these cards - you're stuck with what the game gives you the first time.
Miscellaneous Tiles
Altar of Sacrifice - The player chooses two creatures from their deck. One of those cards will be removed from the deck, while the one performing the ritual will gain any sigils on the sacrificed creature, but NOT any other intrinsic traits of that creature. Creatures without sigils cannot be sacrificed, and creatures with added sigils from any source cannot be used in the ritual at all. Certain specific creatures (e.g. Ijiraq) are also ineligible to participate. If the player doesn't have two creatures eligible to participate in the ritual, then nothing happens.
Altars of sacrifice are one of the most important tiles in the game. They do double duty - depleting your deck while also powering up your creatures. Typical uses for altars include moving valuable sigils from expensive creatures onto cheaper ones, powering up creatures to be used as Mycologist experiments, or simply removing undesirable creatures from your deck.
However, there may be situations where you want to avoid altars. Always check your deck before entering an altar, especially if you are on a path that has several of them in a row. If an altar would force you to sacrifice an important creature or a duplicate card you need for the Mycologists, then you should avoid the tile instead. Be very aware of what cards can and can't participate in the ritual.
Note that, amusingly, a pelt can perform a sacrifice. Don't ask how.
Bone God Altar - The player chooses a creature from their deck. That card is removed from the deck and the player gains a Minor Boon of the Bone God, which grants one bone at the start of each battle. If the player sacrifices a Black Goat, then they will instead receive a Boon of the Bone God that grants eight bones at the start of each battle. Boons from multiple sacrifices stack. Certain specific creatures can't be sacrificed to the Bone God.
The benefits of Minor Boons - even on a bone-focused deck - are pretty trivial, so the main draw of the Bone God is depleting your deck. That being said, the more powerful Boon can enable you to play any card with a bone casting cost on your first turn, which can be a major benefit even in a deck built around blood sacrifices. If you get stuck with a Black Goat that you don't need (because all of your creatures have a cost of one blood, for example), then by all means offer it up.
Campfire - The player chooses a creature from their deck. This creature permanently gains either +1 attack or +2 health. Afterwards, the player has the opportunity to repeat the process, giving the creature an additional bonus. However, there is a chance that the campers will eat the creature, removing it from the player's deck; if this happens and the player has an open slot in their backpack, they will receive a Hoggy Bank. If the campers eat a Ring Worm or a creature with the Touch of Death sigil, the campers will die and the risk of losing a card will be removed for subsequent campfires.
Some creatures can't be enhanced at a campfire. In particular, creatures with a variable attack attribute (including ants, tentacles, Lammergeier and the Red Hart) can't have their attack increased.
The main strategic question with campfires is whether or not to poison the campers if you are able. Poisoning them will enable you to safely power up your creatures twice per tile, a benefit in any deck but especially important for some late-game challenges that really require super creatures. Leaving the campers alive lets you use the campfires as an unreliable means of deck depletion, which may also be critical for decks built around specific cards.
The other question is which creatures will receive the bonuses. Proportionally, campfire bonuses give greater benefits to small creatures (large ones benefit more from the Mycologists). Attack bonuses in particular have the greatest impact on creatures that get more than one attack per turn due to having the Double, Bifurcated or Trifurcated Strike sigils. A Mantis God with one added point of attack can end a battle on the first turn, which is the best way to clear some of the more unfair fights.
Items - If the player has fewer than three items (two, with the Smaller Backpack challenge), they are offered a random selection of three items for each empty slot. If the player has a full backpack, they will instead receive a Pack Rat card.
The Pack Rat is deck bloat, especially if you have a board with a lot of item tiles. It might be worth sacrificing one to put its sigil on a cheaper creature, but if you don't see an altar coming up, then you'd better empty out your backpack. Always pay attention to your route and, if you see an item tile on the horizon, be sure to use one of your items so you don't have to draw another card.
Green Mage - The player chooses a creature from their deck. The Green Mage creates a copy of that card, with one of the following changes, chosen at random:
- Increase or decrease the copy's attack by 1
- Increase or decrease the copy's health by 2
- Change one of the copy's sigils to a random sigil (only if the base creature has added sigils)
Certain specific creatures can't be copied.
The Green Mage is an absolutely absurd tile that you should try to land on every chance you get. While it does increase the size of your deck, the fact that you get to select the card that gets added means that this can diminish your risk of a bad draw. You can duplicate a super creature, thereby increasing the chances of drawing it; duplicate a creature just before a Mycologist tile to guarantee a desirable experiment; duplicate a Black Goat to increase your pool of worthy sacrifices.
One note of caution: A creature with an attack of one can potentially yield a copy with an attack of zero. Keep that in mind before copying something like a Mantis God.
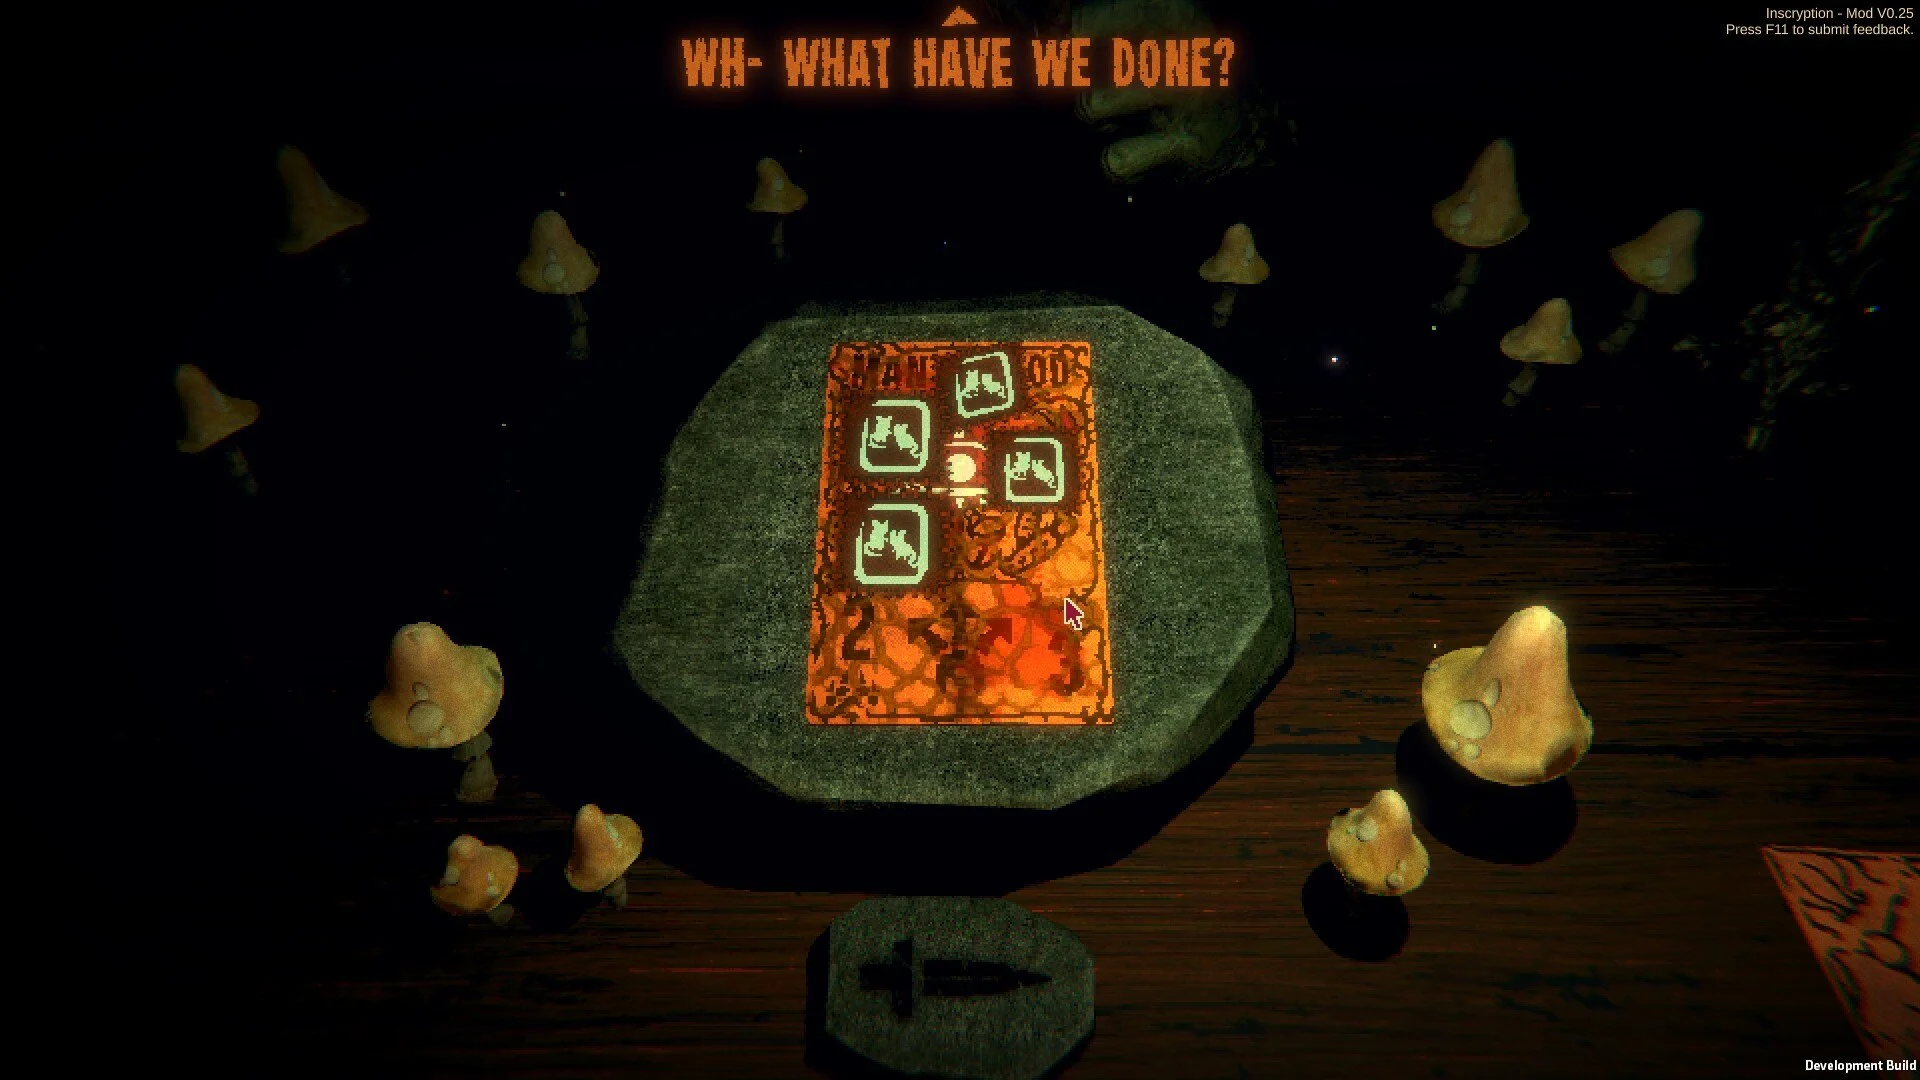
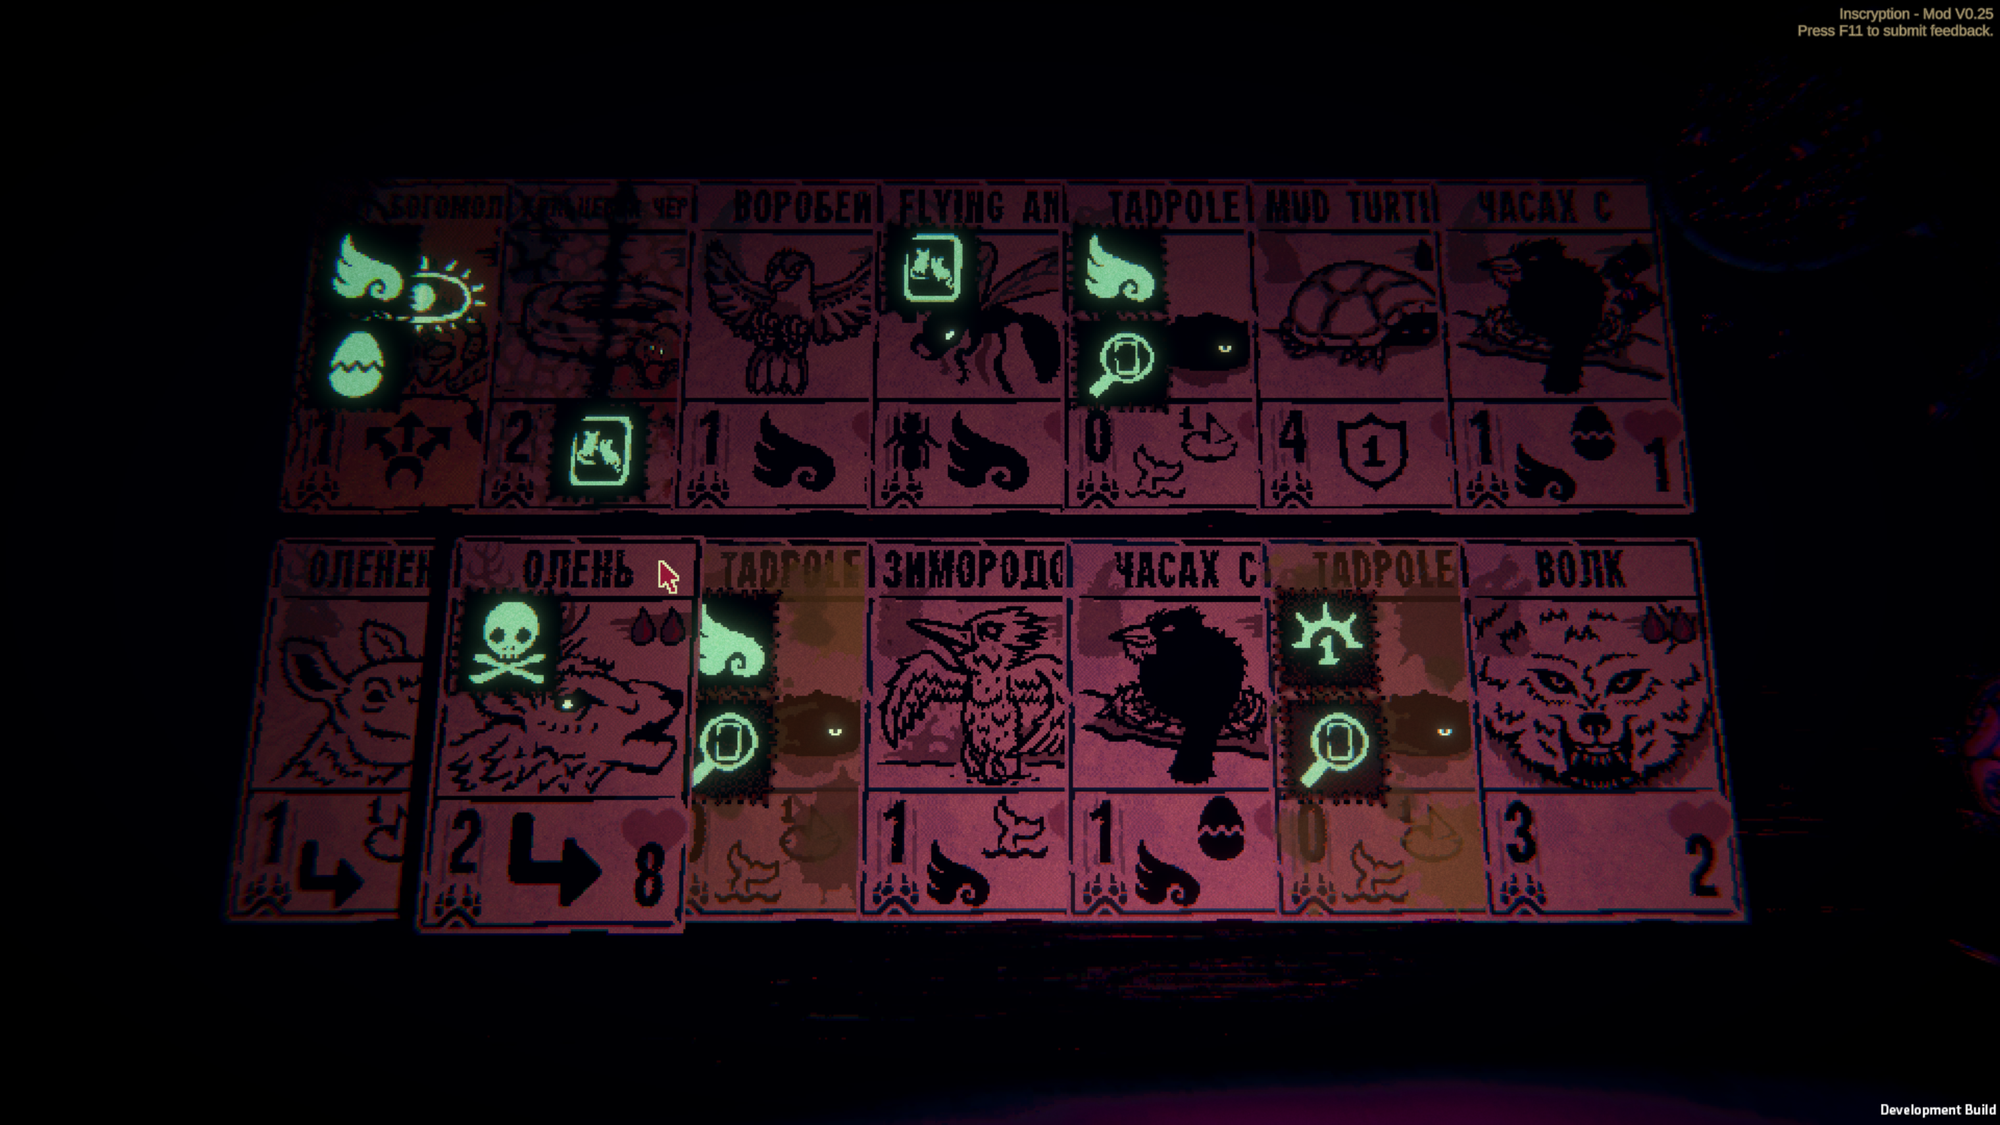
Mycologists - If the player has duplicates of any card in their deck, the Mycologists will do an experiment that combines them into a single card. The experiment will have the combined attack and health of the base cards (including bonuses, i.e. from a campfire) and any added sigils from the base cards. If the player has an odd number of any card in their deck, the Mycologists will pick two of them - the player cannot select which ones will be used.
If the player doesn't have duplicates of any card in their deck, the Mycologists will force the player to draw one of three cards, each of which is a duplicate of a card in their deck.
The Mycologists may be second only to altars of sacrifice in terms of their importance. By way of example, it's always better to have a 6/4 post-experiment Wolf with a cost of two blood than two ordinary 3/2 Wolves for the same cost each. The experiment also inherits all added sigils from the two creatures, enabling a savvy player to pack a ridiculous number of sigils onto a single card. For more challenging runs, creating such super creatures is absolutely critical.
As with altars, though, there are times in which avoiding Mycologist tiles is recommended. In certain situations, you might be better off with more of a certain card in your deck. This is particularly true for cards like the Cat and the Black Goat which are intended for use as sacrifices.

Prospector - The player selects one of three hidden cards. One of these cards is a Golden Pelt, and the other two are random insect tribe cards with an added sigil.
There's not much to say about the Prospector's game from a strategic point of view. These are slightly more valuable tiles if you are playing an insect deck; otherwise, it's all random. Given that it's an optional draw, you should avoid this tile if you don't need the Pelt.
Trader - If the player has pelts in their deck, the Trader will swap them for other cards, as follows:
- For each Rabbit Pelt, the player may take one of eight standard cards.
- For each Wolf Pelt, the player may take one of eight standard cards with added sigils.
- For each Golden Pelt, the player may take one of four random rare cards.
If the player has no pelts or has Pelt Lice in their deck, the Trader will give them six teeth and send them away.
Note that the first tile in a Kaycee's Mod run will always be a Trader, unless you lack pelts in your starting deck due to restarting the game too many times.
The large selection of cards offered by the Trader means that you generally get better results than you would from standard draw tiles. This makes the Trader very desirable if you are seeking out specific cards, such as for an ant deck or to use with the Mycologists. The drawback is you have to fill your deck with pelts, cards with very limited strategic value. I generally don't bother with the Trapper/Trader combo unless I am angling for a specific card.
Woodcarver - The player must select from one of three random totem parts, always including at least one head piece and one base piece. Each head piece corresponds to one of the card tribes (canine, hooved animal, bird, reptile/amphibian, insect) and each base piece corresponds to a random sigil. Then, if the player has at least one of each piece, the woodcarver will combine two of them (chosen by the player) to form a totem. This totem will add the sigil on the base to each friendly creature with the tribe shown on the head.
The player can collect a maximum of six totem pieces. If the player lands on a Woodcarver tile after that, the Woodcarver will give them an Amalgam card.
If you can find a base piece with a powerful sigil, then Woodcarver totems can be very powerful even in a deck not built around a specific tribe. Being able to add just one more sigil to a key creature can potentially break a deck. Case in point: The Black Goat is in the hooved tribe, so one can use totems to apply any number of broken sigils to it and essentially make playing costs irrelevant. Also note that you can use a totem along with an altar to add two sigils to a card, opening up some disgustingly powerful combinations.
Because some sigils are (at best) a mixed blessing, it is possible to end up with a totem that gives undesirable sigils to some of your creatures. If this happens, then you'll just have to try and hit another Woodcarver tile and get a new base piece. You can't refuse to take a totem if you have two complementary pieces.
There is a risk of being forced into a draw on a Woodcarver tile, but the odds are remote. In fact, I've only seen this once in all the runs I've done. It's rare to see seven Woodcarver tiles in a single run, and unlikely you'd hit all of them even if that game does generate boards like that.
Boss tiles
Boss fights can also change in small ways depending on when you fight them. The later in a run you encounter a particular boss, the harder it is. In general:
The Prospector - Coyotes are replaced with stronger canine tribe creatures (Wolves and Dire Wolves) if you fight him after the first map.
The Angler - Has Bait Buckets already on the board in the first phase and can play Great Whites at any time if you fight him in the last map.
The Trapper/Trader - The Trapper will sometimes play harmless creatures (e.g. Rabbits) and the Trader has much weaker creatures if you fight them before the third map.
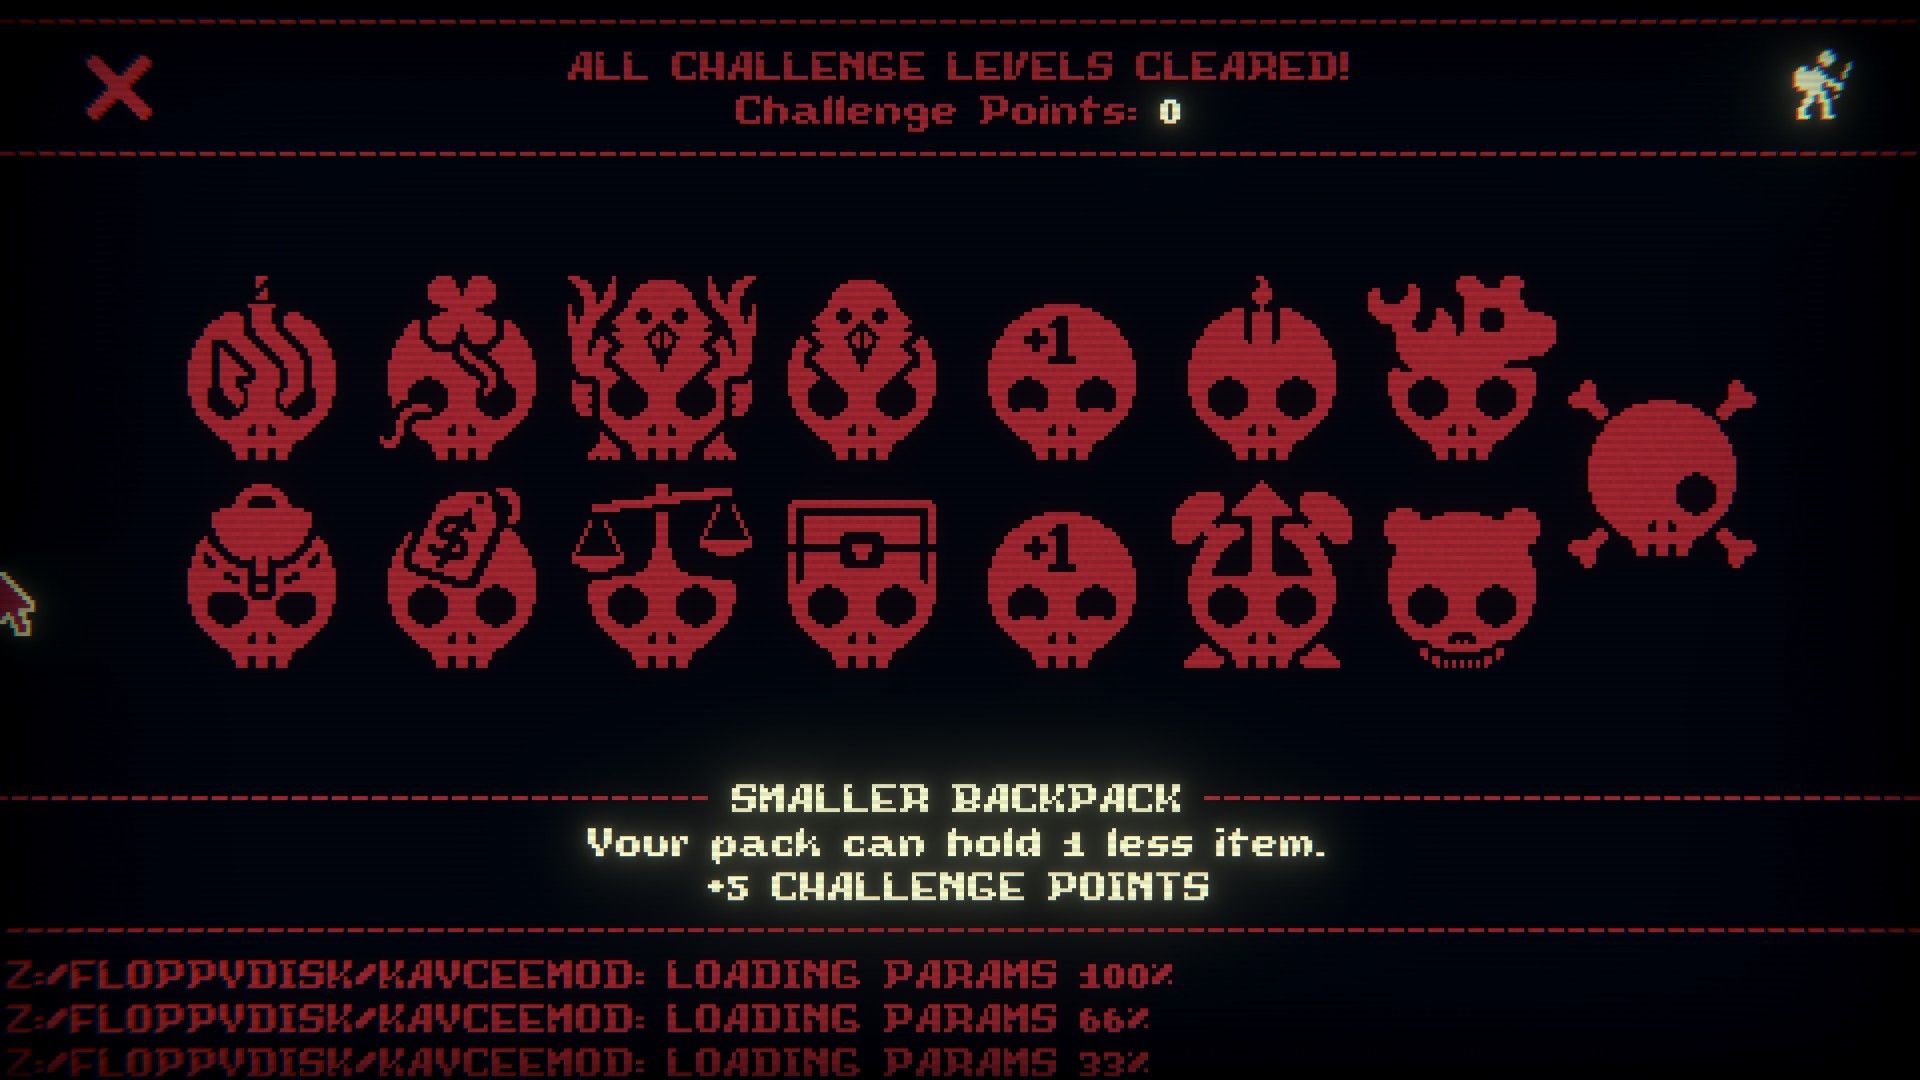
Challenges
Challenges are exactly what they sound like - special settings that make each run more difficult. Each challenge has a point value. Advancing through Kaycee's Mod requires clearing "challenge levels," each of which requires challenges with values adding up to ten times the level. Each completed challenge unlocks new cards, starter decks, challenges, and lore.
Here is a brief rundown of the challenges, with values:
No Hook (5) - Start without the Angler's Hook.
The Angler's Hook allows you to steal one of your opponent's creatures. It is a powerful item and very nearly essential for surviving the first boss in a Grizzly Bosses run. In any other situation, it's merely a nice thing to have and you won't lose much for not having it.
Smaller Backpack (5) - Carry a maximum of two items.
Be very careful with this challenge, as it's easy to forget your two-item limit and end up with a deck full of Pack Rats.
No Clover (5) - Start without the clover, meaning no redraws on draw tiles.
This is probably my least favorite of the starting challenges. While the clover is risky, it is critical in decks built around specific cards or tribes.
Pricey Pelts (5) - Doubles the cost of Trapper pelts.
I almost never buy pelts, so I almost always take this challenge. The pelts still aren't all that expensive, and if you have the skill to consistently overkill your opponent it won't make much of a difference.
Boss Totems (15) - All bosses are totem fights.
This has the greatest impact on the Prospector, whose deck is heavy with canines. It has a much smaller effect on the Trapper/Trader, and very little on the Angler since his Great Whites don't have a tribe.
Tipped Scales (20) - Start each battle with a point of damage.
This isn't all that impactful for a 20-point challenge. It does mean that you have to deal six damage to win, which means that a powered-up Mantis or Mantis God (or another card with the same sigils) can still win a fight on the first turn. Against bosses, the scales reset to the middle between phases, so this only affects the first phase of each battle.
All Totem Battles (20) - All combat tiles are totem combat tiles.
In most cases, totem fights aren't that much harder. This makes for a harder run than Boss Totems, but in general, the easy battles are still easy while the difficult battles are comparably impossible.
No Boss Rares (15) - Bosses offer regular cards instead of rares.
With this challenge in effect, the main way to find rares is by trading Golden Pelts to the Trader. This arguably makes Prospector and Trapper tiles more important and makes Pricey Pelts a less desirable challenge. I generally don't make heavy use of rares in my decks, though, so this never hurts me much.
More Difficult (15) - Regular fights are harder - they may feature more creatures or stronger creatures.
The in-game description is suitably vague, but the nub of it is that regular battles are slightly more difficult. Unlike most challenges, More Difficult can be picked twice for 30 challenge points. Selecting it once is usually safe, as the effects are very subtle - as with All Totem Battles, it won't make the easier fights any more challenging and it won't matter at all if you win on turn one.
Single Candle (30) - You only have one candle, meaning any loss is a Game Over.
I have completed exactly one run with the Single Candle challenge, and I don't intend to try for another as this challenge is an absolute nightmare. One candle means you can't make any mistakes at all. Play the game a few times and you'll see why this is a problem - some of the regular fights are so unfair that you'll likely lose if you can't win on the very first turn. Every Single Candle run I attempted felt like it was a pure gamble. Add to that the minor (yet aggravating) fact that you can't get the Smoke during boss fights, and this just isn't worth it. There are easier ways to get 30 points.
Annoying Starters (10) - Your starting cards have the Annoying sigil (inverse of Stinky; opposing card has +1 attack)
The Annoying sigil isn't such a big deal, but even if you do find it a problem then it's very easy to get rid of your starters and not have to deal with this at all.
Squirrel Fish (20) - Your Squirrel cards have the Waterborne sigil.
In practical terms, this means that you can't chump block with your Squirrels. It's really not such a big deal - the only real downside is it's a little harder to abuse the Corpse Eater sigil to get creatures out for free. Note that this only affects Squirrels you pull out of your Squirrel deck - Squirrels from the Squirrel-in-a-Bottle are regular Squirrels without the sigil.
Grizzly Bosses (50) - The second phase of the first three boss fights is replaced by eight Grizzlies.
I already wrote a dedicated guide for this challenge. Suffice it to say that Grizzly Bosses exists primarily to challenge yourself - the 50 points aren't worth facing the bears.
Final Boss (20) - Replaces Leshy with the true final boss.
A blow-by-blow of the true final boss:
- Phase 1: The boss opens with two powered-up Mole Men with one attack each. Every turn, he will target a random square on both your side and his side of the board; at the end of the turn, he will destroy whatever is in those tiles (yes, he kills his own creatures).
- Phase 2: A reprisal of Phase 1, but the player receives a pack of cards a la the Prospector fight between phases.
- Phase 3: A giant creature fight similar to the Moon, but with increased health and attack power. Damaging the creature will cause additional creatures to spawn on the player's side, provided there are free tiles.
All in all, the true final boss favors slightly thicker decks with more durable creatures. A Grizzly Bosses deck will do very well, so this boss is much easier than the Grizzly fights.
Sigils
This is not a complete rundown of all available sigils, as most are self-explanatory. Rather, this is to note some sigils that are particularly abusable. Cards and totem base pieces with these sigils can be very powerful.
Ant Spawner
Found on: Ant Queen
Effect: When you play this creature, put a Worker Ant in your hand.
Ant decks are powerful, easy to assemble, and resistant to bad draws. Ants grow in power as more of them hit the table, so Ant Spawner is a huge boon. Unfortunately, it's on the Ant Queen, which costs two blood - too expensive to make it useful. A simple strategy is to sacrifice the Queen and put her sigil on another ant, but if you can put it on a zero-cost creature (such as a Tadpole or Geck), it's even better as it lets you potentially play two ants on your first turn for an easy four damage.
Brood Parasite
Found on: Cuckoo
Effect: When you play this creature, if the opposing square is empty, put a Broken Egg card in that square.
Rather than destroying a dangerous creature, why not stop your opponent from playing it at all? The card created by Brood Parasite will stop your opponent from playing anything into that column for the rest of the battle. There are two caveats. One, there is a small chance that it will create a Raven Egg, so be ready for that. Two, make sure you only put Brood Parasite on a creature that also has Flying. This won't be a problem if you give it to a creature via an altar of sacrifice since the Cuckoo also flies, but be cautious if you get it on a totem - your non-Flying creatures will just attack the egg and waste their turn.
Corpse Eater
Found on: Corpse Maggots
Effect: If this creature is in your hand and a creature on your side dies in combat, replace it with this creature.
Corpse Eater allows you to play any creature for free. Just throw a Squirrel or a Rabbit Pelt in front of an enemy creature and watch that Urayuli hit the table without having to pay its ridiculous cost. I'll always take Corpse Maggots if they come up in a draw - even in a deck built around low-cost creatures, this is an extremely powerful sigil.
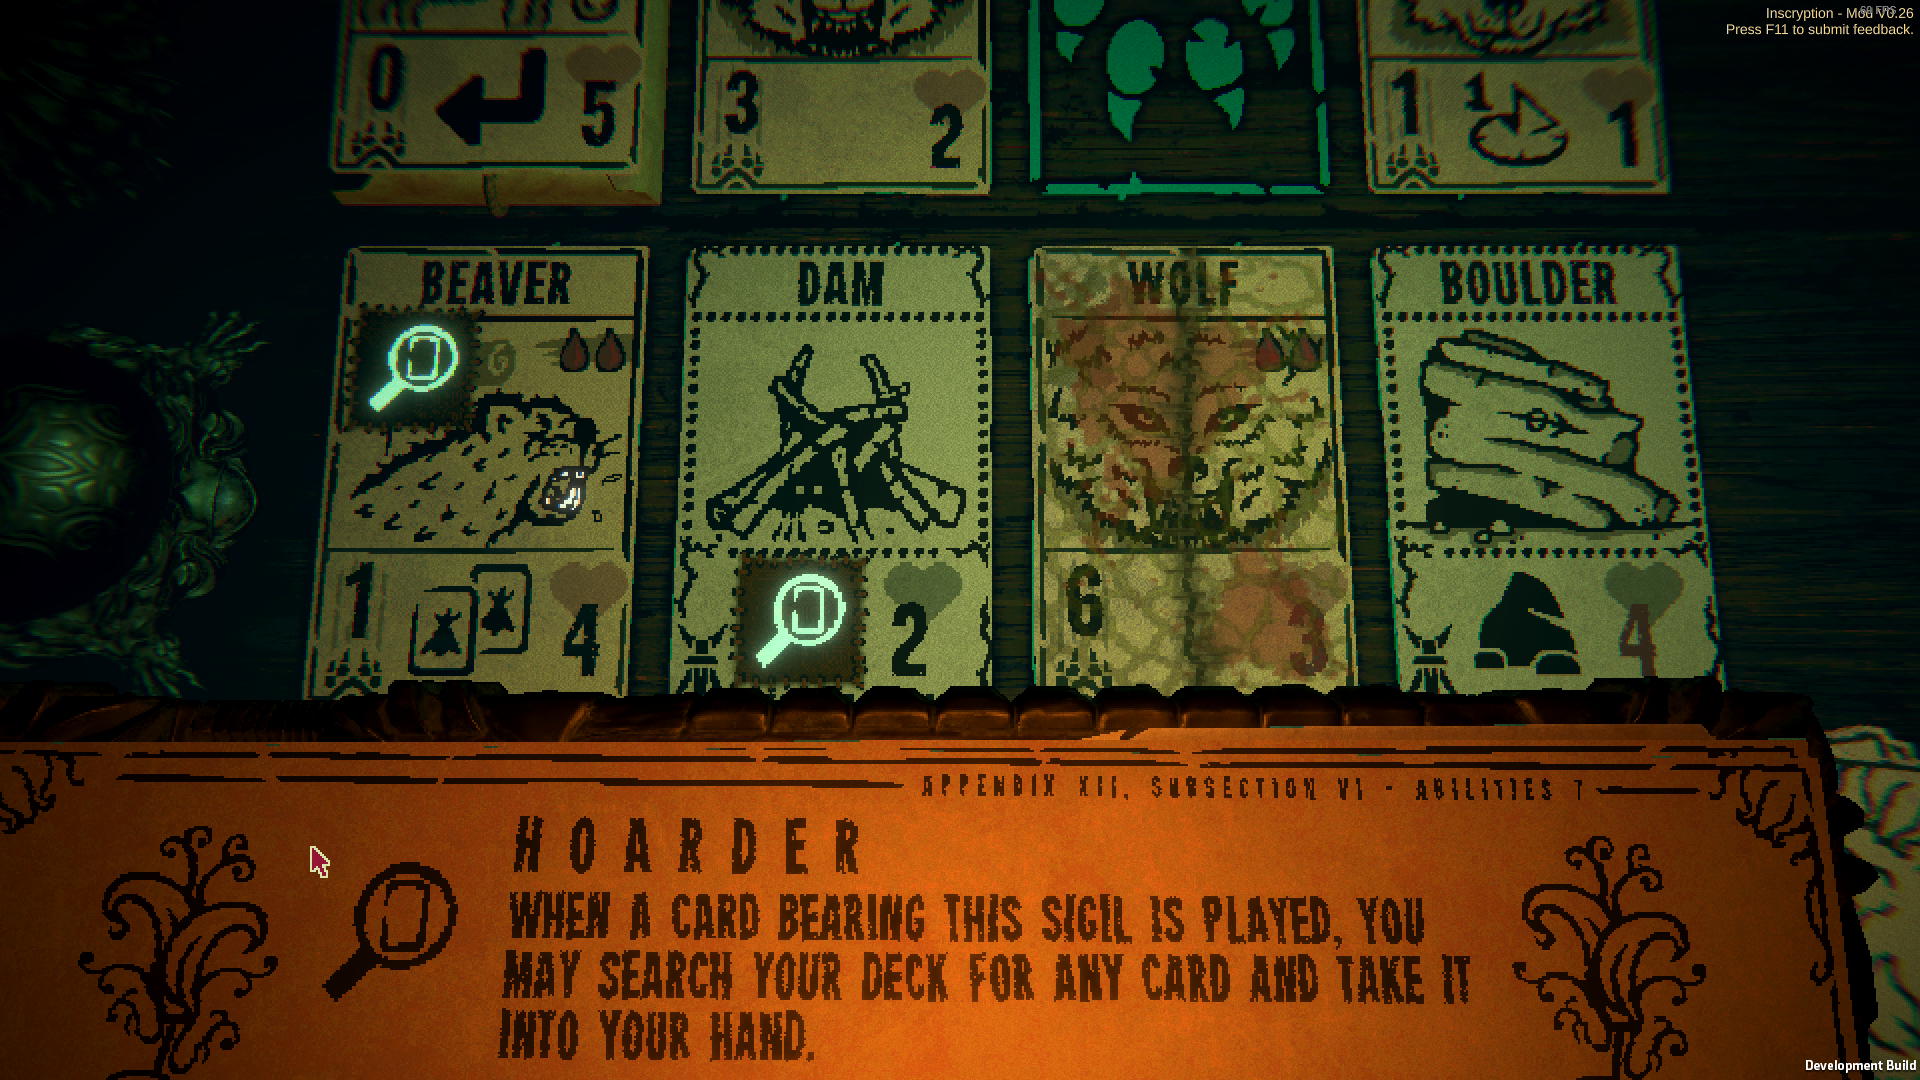
Hoarder
Found on: Magpie
Effect: When you play this creature, search your deck for any card and put it in your hand.
Hoarder is a tremendously powerful sigil that you need to get off that pricey Magpie as soon as possible. There are a few particularly powerful combos here. Put Hoarder on a zero-cost creature or a Cat and you can play any one-blood cost card out of your deck for free. Put it on a Black Goat and you can play any card with a three-blood cost card from your deck on your first turn.
Trifurcated Strike
Found on: Mantis God
Effect: This creature attacks the tiles in front, to the left, and to the right.
All of the Strike-type sigils are powerful, but this one is a monster. The Mantis God is easily one of the best cards in the game, worth taking every time it shows up. With a casting cost of one blood, you can play it on your first turn and inflict three easy points of damage. Boost its power at a campfire, and you'll inflict six damage, enough to win the match even with Tipped Scales. The only question is whether to keep the Mantis God as is, or sacrifice it and put its amazing sigil on one of your super creatures.
Undying
Found on: Cockroach, Ouroboros
Effect: When this creature dies, put a copy of it in your hand.
Undying is a useful sigil with some very interesting interactions. Here are a few fun sigils to consider putting on that Cockroach:
- w/Corpse Eater: The creature will replace itself every time it's killed in combat, allowing it to block infinitely.
- w/Trinket Hoarder: Generate an unlimited number of items.
- w/Ant Spawner: Generate an unlimited number of Worker Ants. If you use a totem and an altar to put both sigils on a zero-cost creature, you can fill your side of the board with ants in a single turn.
- w/Bone King: On a Cockroach, enables infinite sacrifices. Use a totem and an altar to get both on a cheaper creature (a Mealworm will work for this), and you make a net gain of bones every time you play and sacrifice the creature.
Start: Finish
50 hours in and I still haven't discovered everything there is to find. As with any game of this nature, there are a lot of quirks waiting to be found and exploited. This is merely a starting point - and perhaps, with time, you'll find a new end.
Join the conversation
What do you think? Reply below to share your perspective.